• Portfolio
  • About
  • Blog
  • Social
  • Contact
Menu

Addington Furniture

7773 W Torngat Ct
Tucson, AZ, 85743
Phone Number
Conservation • Restoration • Recreation

Your Custom Text Here

Addington Furniture

  • Portfolio
  • About
  • Blog
  • Social
  • Contact

1675 Gole Flower

September 30, 2015 Luke Addington

Here are some photos from my marquetry demonstration this past Monday. By the end of the evening we had a crowd of about 20+ people watching with well over a hundred people stopping by throughout. I was very surprised to see so many people interested in marquetry.

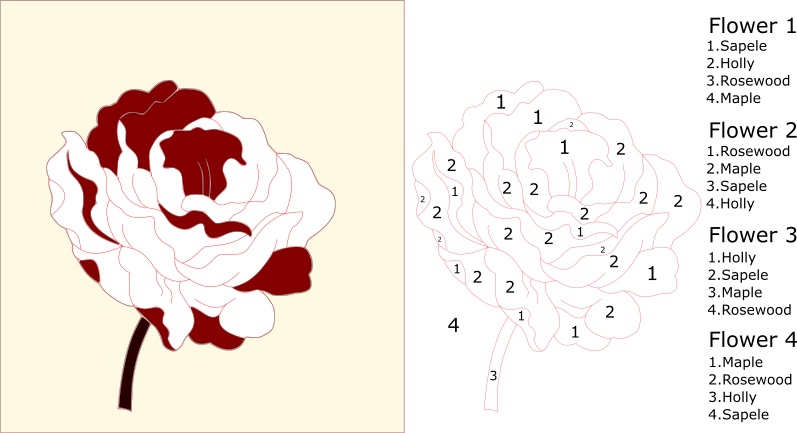
Following is Pierre Ramond's tracing of a flower in the Pierre Gole bureau (1675). I initially trace this drawing in inkscape, creating a rough vector drawing. This allows me to scale the drawing up or down without loss of quality. After getting the rough drawing done I go back to a photo of the original flower and adjust the drawing so it more closely resembles the actual flower. Then I arrive at the final drawing I will work from - quite different from my first version. I draw the outline in red as it is easier to see while sawing.

View fullsize 1.jpg
View fullsize 2.jpg
View fullsize 3.jpg

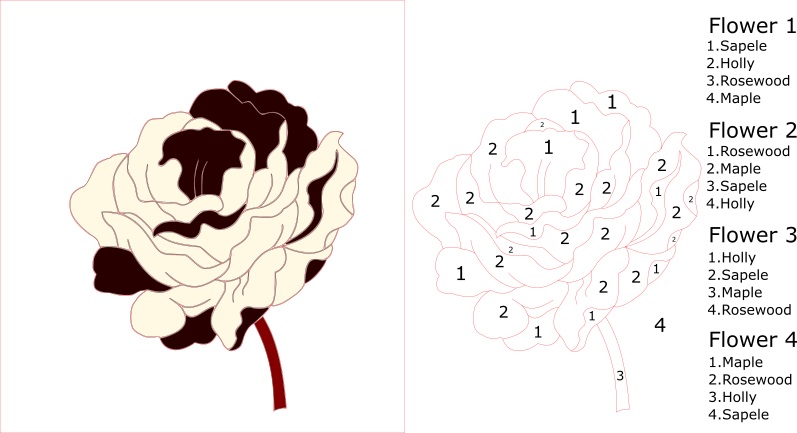
Then I create color maps and plan out what veneer species I will need to match the original flower. For this particular flower I only really needed two veneers, a light and a dark. But I wanted multiple copies so in my packet I assembled two light and two dark veneers. Those were Holly (sawn by myself at 2mm thickness), Sapele 1.6mm, Rosewood 1.6mm, and Curly Maple 1.6mm. Here's a video showing some of the prep of the Holly veneer. I also paper back all of my veneers. It provides a lot of stability to the veneers during sawing as well as during removal from the packet. Here's a short video of that process with instruction.

Next I flip the image so when I go to assemble the flower face down it is easier to keep track of what piece goes where.

View fullsize 4.jpg
View fullsize 5.jpg
View fullsize 24.jpg
View fullsize 25.jpg
View fullsize 26.jpg
View fullsize 27.jpg
View fullsize 28.jpg
View fullsize 29.jpg

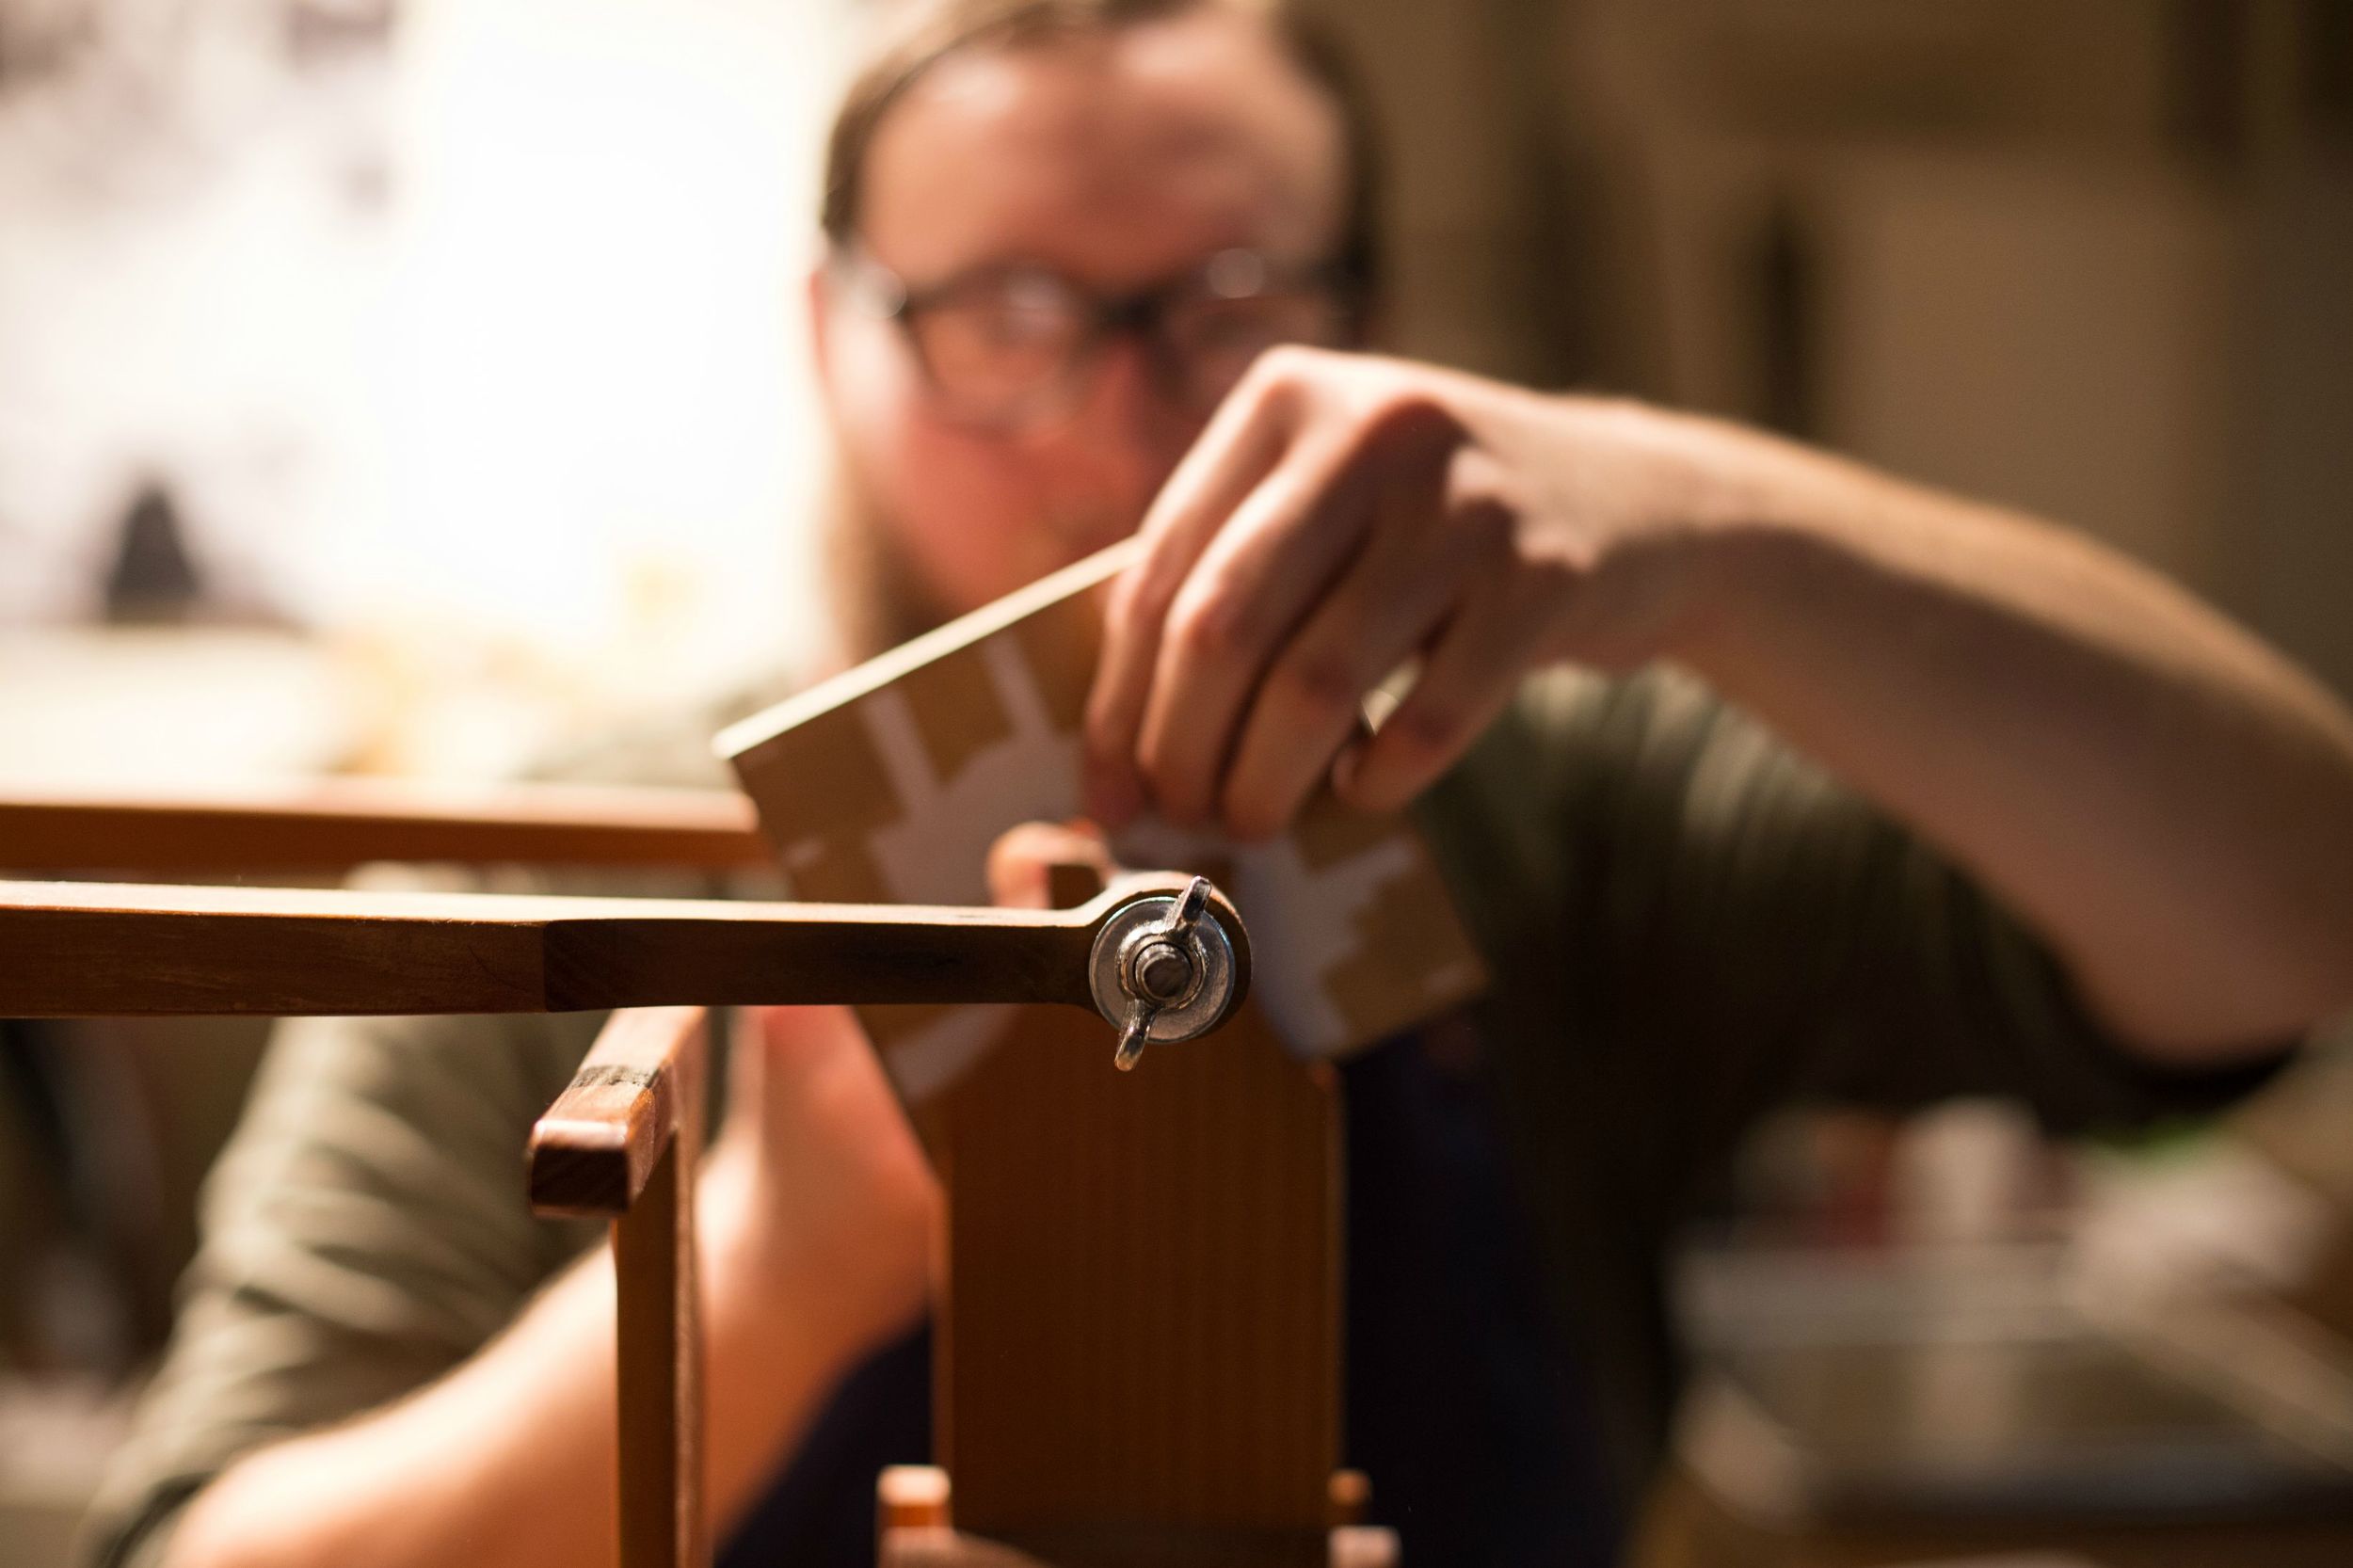
The next series of images show the flower being cut out on the chevalet and organized on a tray.

View fullsize 6.jpg
View fullsize 7.jpg
View fullsize 9.jpg
View fullsize 10.jpg
View fullsize 13.jpg
View fullsize 11.jpg
View fullsize 14.jpg
View fullsize 15.jpg
View fullsize 16.jpg
View fullsize 17.jpg
View fullsize 18.jpg
View fullsize 19.jpg
View fullsize 20.jpg
View fullsize 21.jpg
View fullsize 22.jpg

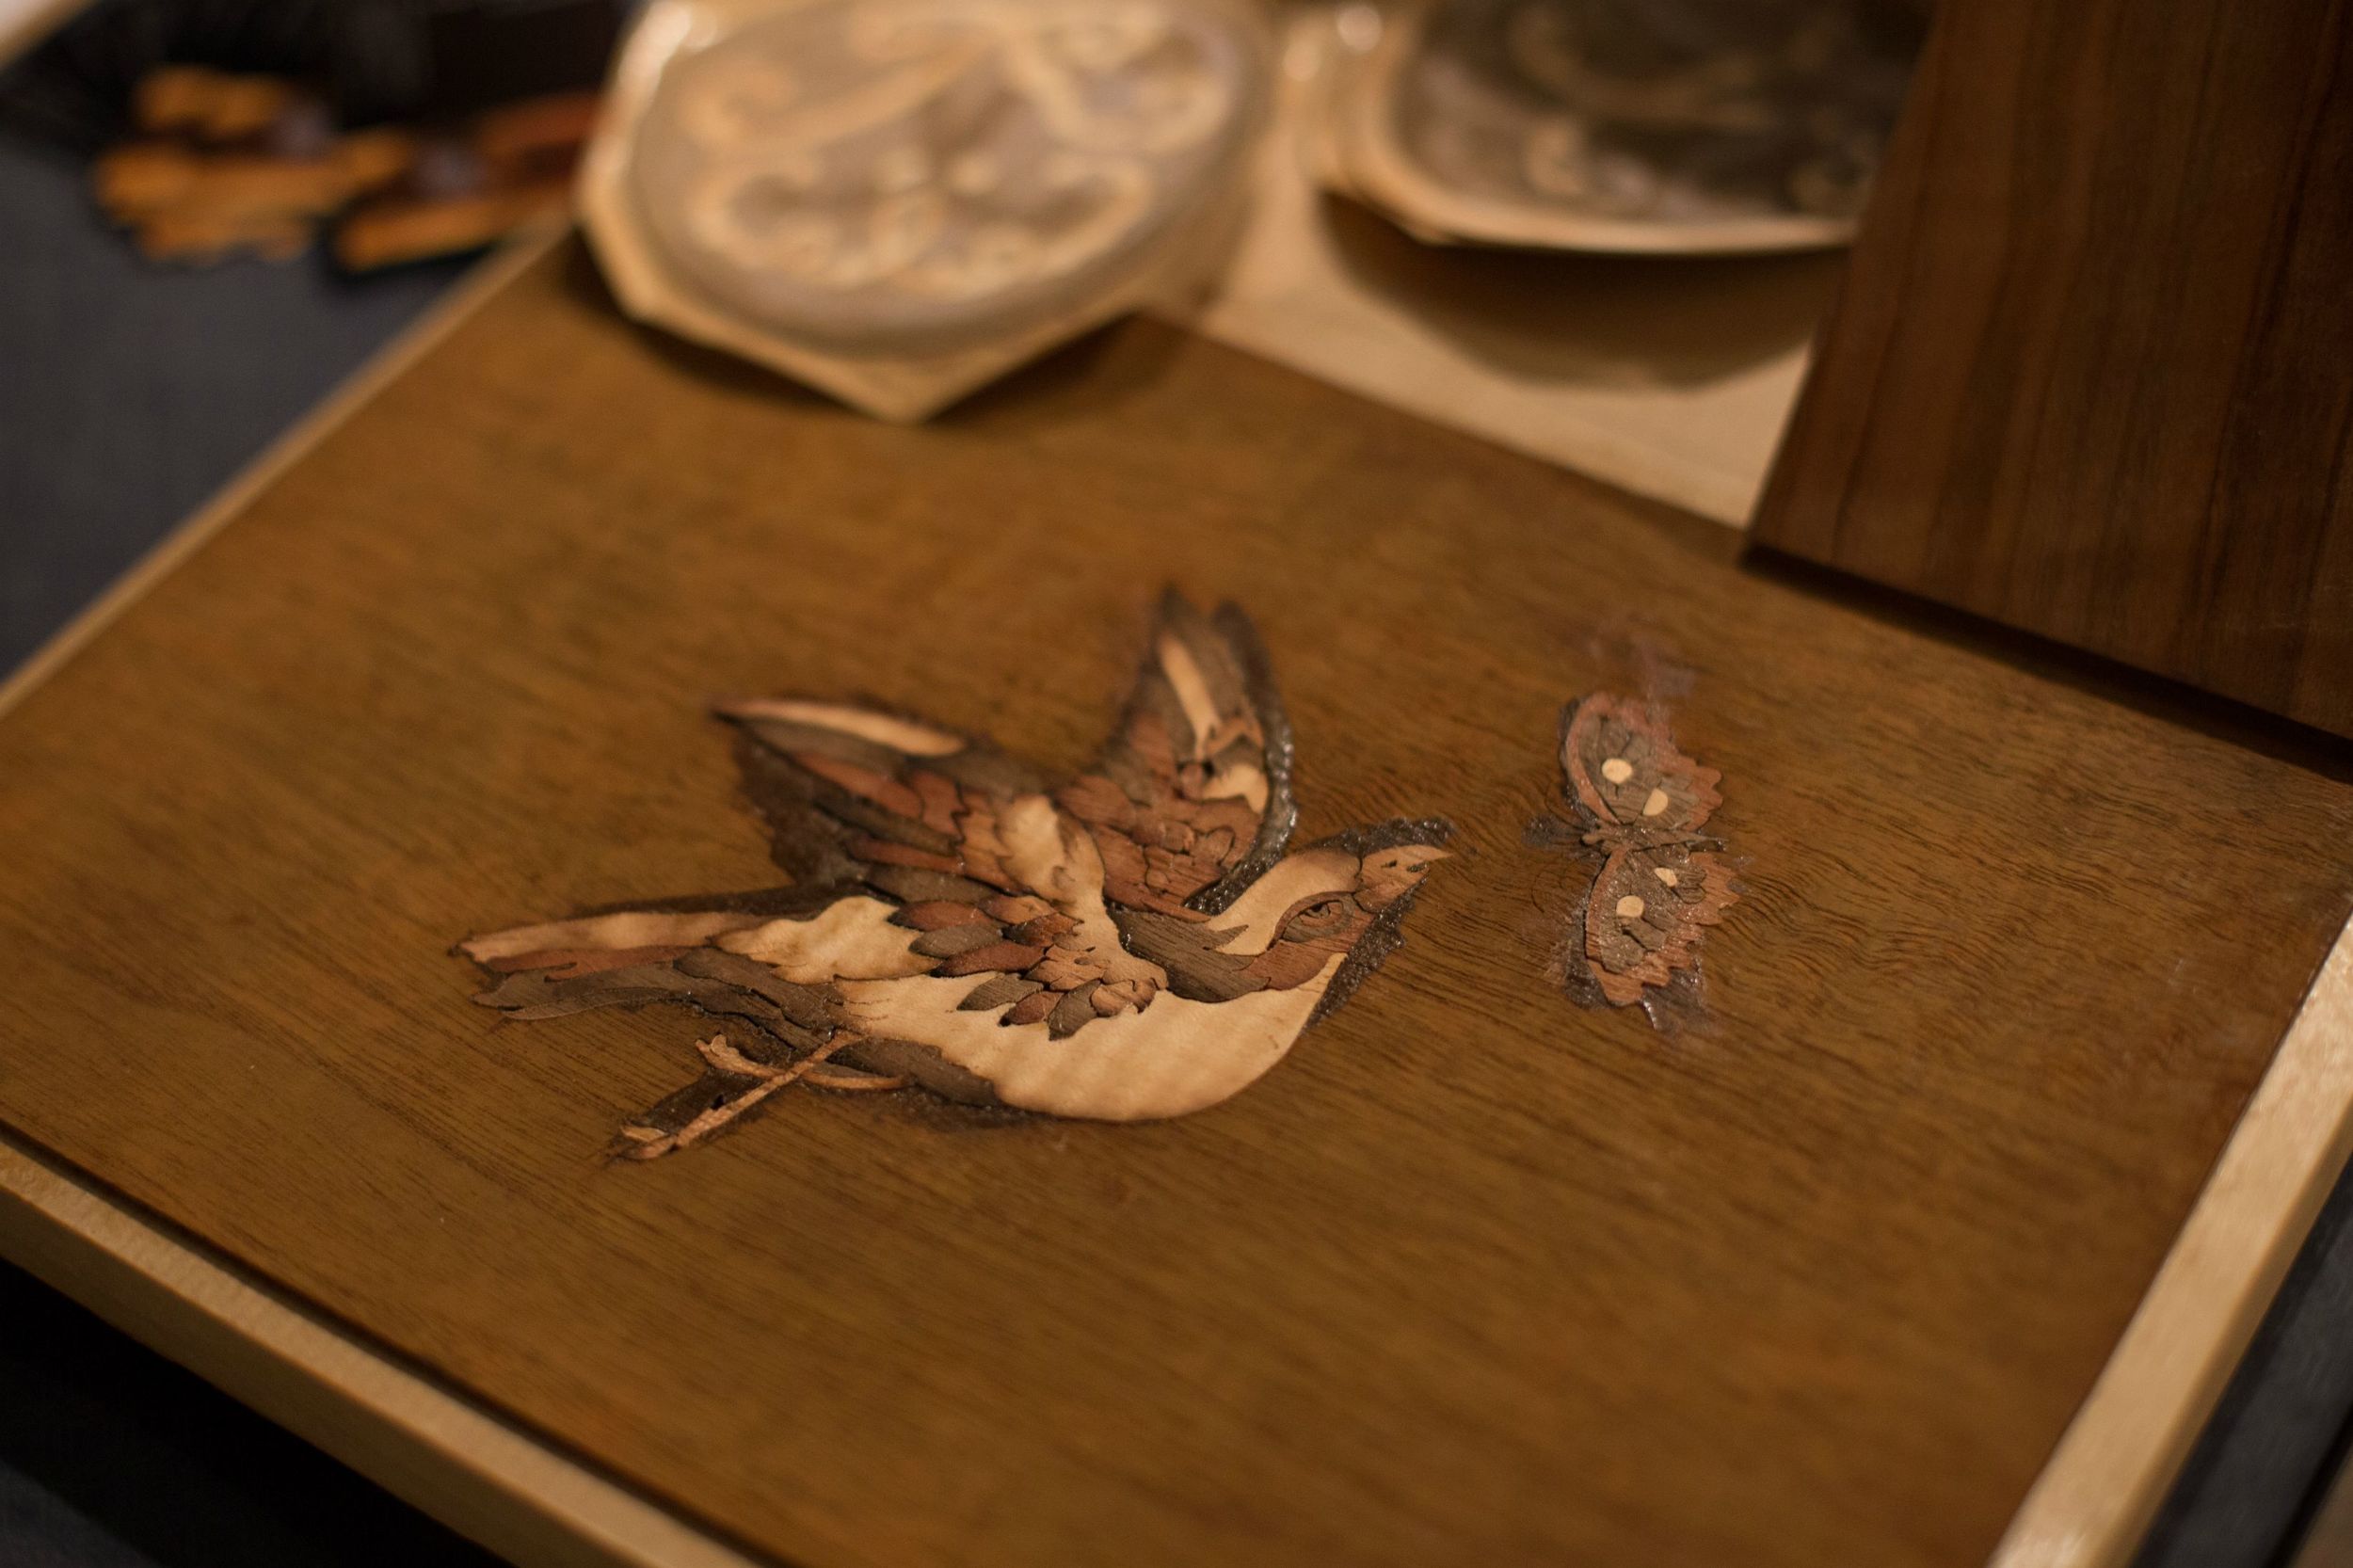
This is where we ended the night. All of the petals are cut out and the initial organization is done. After this I would mix the colors according to the color maps, shade the pieces with hot sand, then assemble them face down on an assembly board.

In Marquetry, Teaching Tags Marquetry
Comment

Dovetailed Box Class

July 3, 2015 Luke Addington

I'll be teaching a class on making this dovetailed box at the end of July. This is the simplest box & lid design I could come up with that could be taught in two days. The wood is some nice curly cherry. There's a floating panel for the bottom. Finish is padded shellac on this one. Will hopefully have time to go over French polishing in the class.

Below is a photo of the original tail/pin ratio but I re-cut them as I didn't want the piece to look too complicated for a beginner.

View fullsize 2.jpg
View fullsize 3.jpg
View fullsize 4.jpg
View fullsize 5.jpg
View fullsize 6.jpg
View fullsize 7.jpg
In Dovetails, Boxes, Teaching Tags Dovetails
Comment

Moxon Vise Class

June 29, 2015 Luke Addington

A few photos of students making their Moxon Vises in the class I taught Saturday-Sunday, June 27 & 28 2015. These were made with 8/4 cherry from Amish sawyers in Ohio, milled down to 1 3/4", with Benchcrafted hardware. Rear chops are 40" long and front chops are 36" long. We made two sizes, 5 3/4" tall and 6 3/4" tall. Students were able to pick which height worked best for them. Everyone got their vises finished and their stopped chamfer and Lamb's Tongue carved! Great class.

Here the students (from left to right: Chuck, Rob, Bill) are working as a team on the drill press to bore out the holes that will accept the acme screws. After that they chopped out square mortises to house the nut that receives the screws.

View fullsize 06 - RzgpDKU.jpg
View fullsize 07 - BRz119k.jpg
View fullsize 08 - 6QXy0Wu.jpg

After the mechanical aspects of the vises were taken care of the students moved on to the stopped chamfer and Lamb's Tongue. Here they have laid out lines that will be sawn, then chopped, and cleaned up with a spokeshave & scraper to create the stopped chamfer.

View fullsize 09 - 1UmUxB8.jpg
View fullsize 11 - wLNkjIq.jpg
View fullsize 12 - MQGfYSf.jpg
View fullsize 13 - klDvQgB.jpg

Now the students saw out the bulk of the waste for the Lamb's Tongue. This is then refined with chisels, files, rifflers, scrapers, and very fine sandpaper.

View fullsize 14 - IFJGwj3.jpg
View fullsize 15 - itfcXPe.jpg
View fullsize 17 - 21YrEFq.jpg
View fullsize 18 - ANZdhx9.jpg
View fullsize 19 - 5Agd7HO.jpg
View fullsize 20 - K7n4z1r.jpg
View fullsize 21 - NDnldek.jpg
View fullsize 22 - ewSTLMF.jpg
View fullsize 23 - DBD0wL4.jpg
View fullsize 24 - CM2xlul.jpg
View fullsize 25 - 5viyu7B.jpg
View fullsize 26 - WUNutof.jpg

I grabbed a couple photos of Rob with his vise.

View fullsize 01 - 3QMw07l.jpg
View fullsize 02 - 8HYBB87.jpg
View fullsize 03 - 7GqEhjA.jpg

Chuck had one more face to plane on his vise (below) and then he was done. Everyone decided to add suede to the jaws at home. Bill had to take off before I was able to get a photo of his vise.

View fullsize 04 - E6VTbAd.jpg
View fullsize 05 - 4RP7i5p.jpg
View fullsize 28 - ZF7kHfh.jpg
View fullsize 29 - UZP8X08.jpg
In Tools, Teaching Tags Joinery, Moxon vise
Comment

Copyright Addington Furniture LLC, 2015