• Portfolio
  • About
  • Blog
  • Social
  • Contact
Menu

Addington Furniture

7773 W Torngat Ct
Tucson, AZ, 85743
Phone Number
Conservation • Restoration • Recreation

Your Custom Text Here

Addington Furniture

  • Portfolio
  • About
  • Blog
  • Social
  • Contact

Part II: American School of French Marquetry – Fleur Éclaté

February 23, 2016 Luke Addington

Fleur éclaté, my second advanced study piece.

The goal is to cut the exterior lines in piece by piece and the interior lines in Boulle technique, but to leave no gaps in the final piece. If you are familiar with Boulle technique you know that it leaves a saw kerf gap in the final design. Here we are using the éclaté technique to eliminate those gaps but also keep the advantages of the much faster process of Boulle technique for the interior lines.

This is achieved by compensating for the thickness of the saw kerfs by making a cut in the paper design and spacing them out so that the extra material internally will close the gaps and push the pieces tightly together. These cuts must be planned out carefully and I plan on doing a blog post in the future explaining it further.

View fullsize 17.JPG
View fullsize 18.JPG
View fullsize 19.JPG
View fullsize 20.JPG
View fullsize 21.JPG
View fullsize 21a.jpg

To keep this organized I’ll number the explanations for the photos working from left to right for the entirety of the post. 1. refers to the top left, 2. top middle, 3. top right, 4. bottom left, etc.

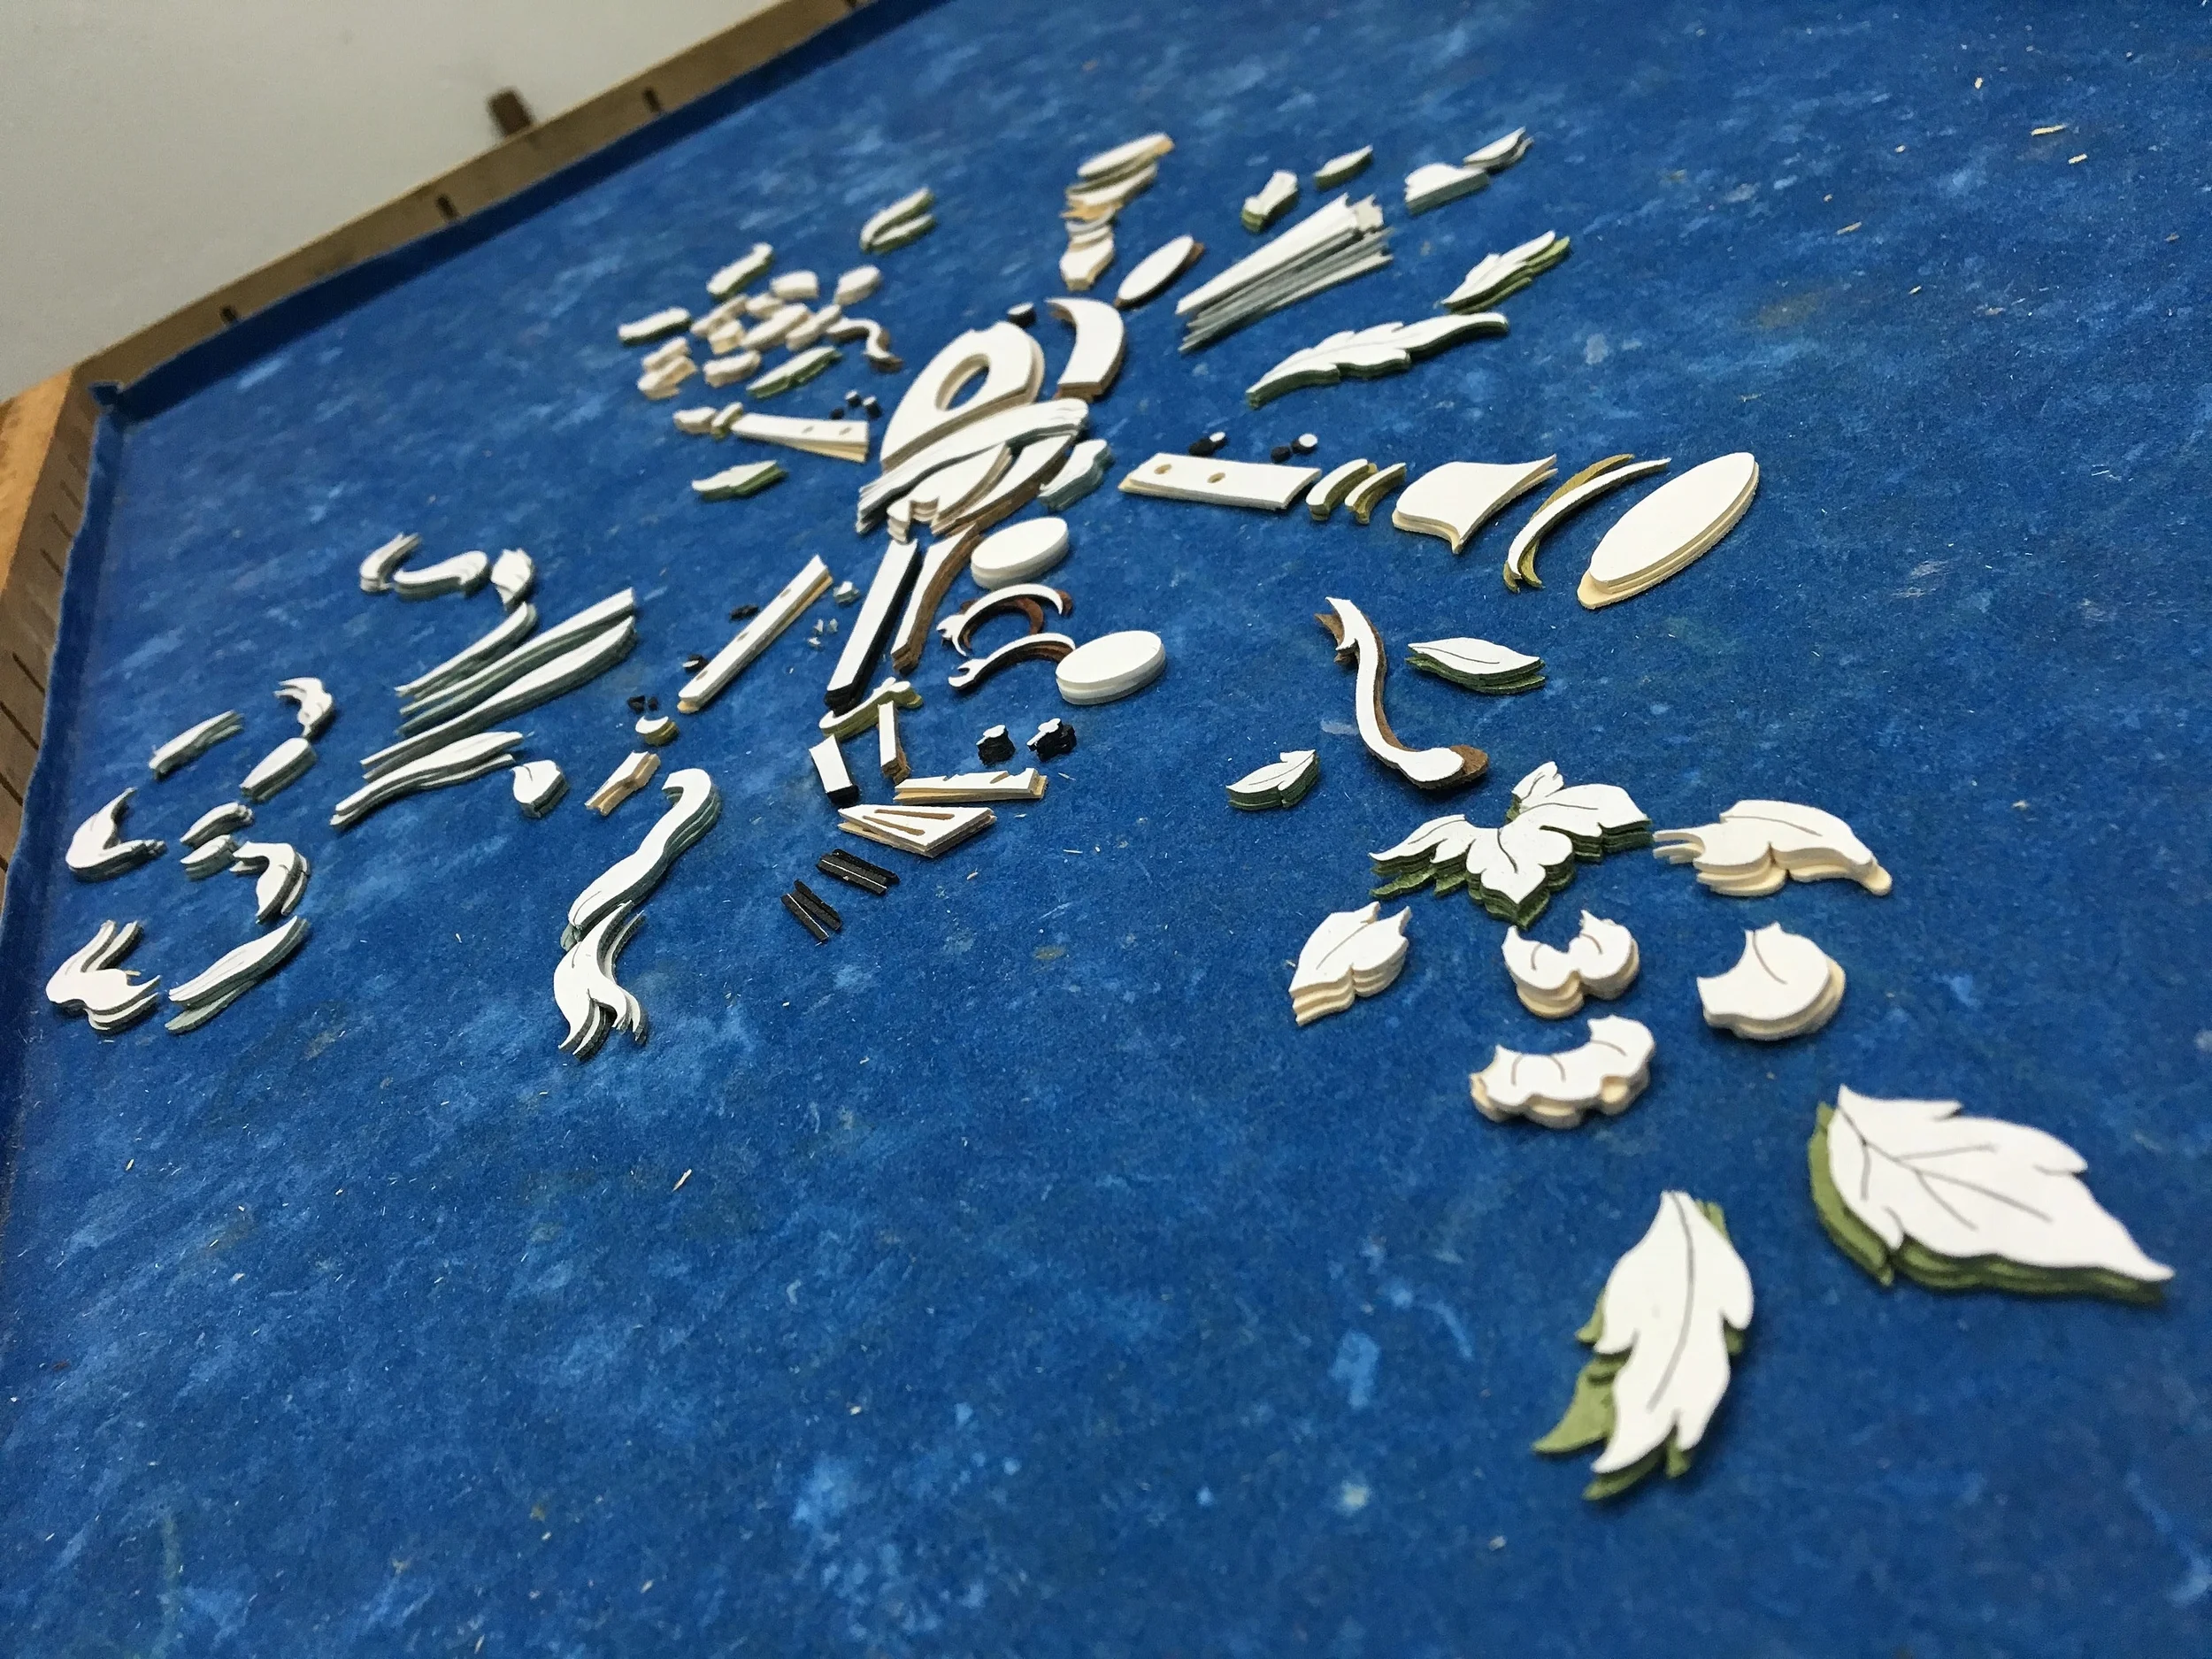
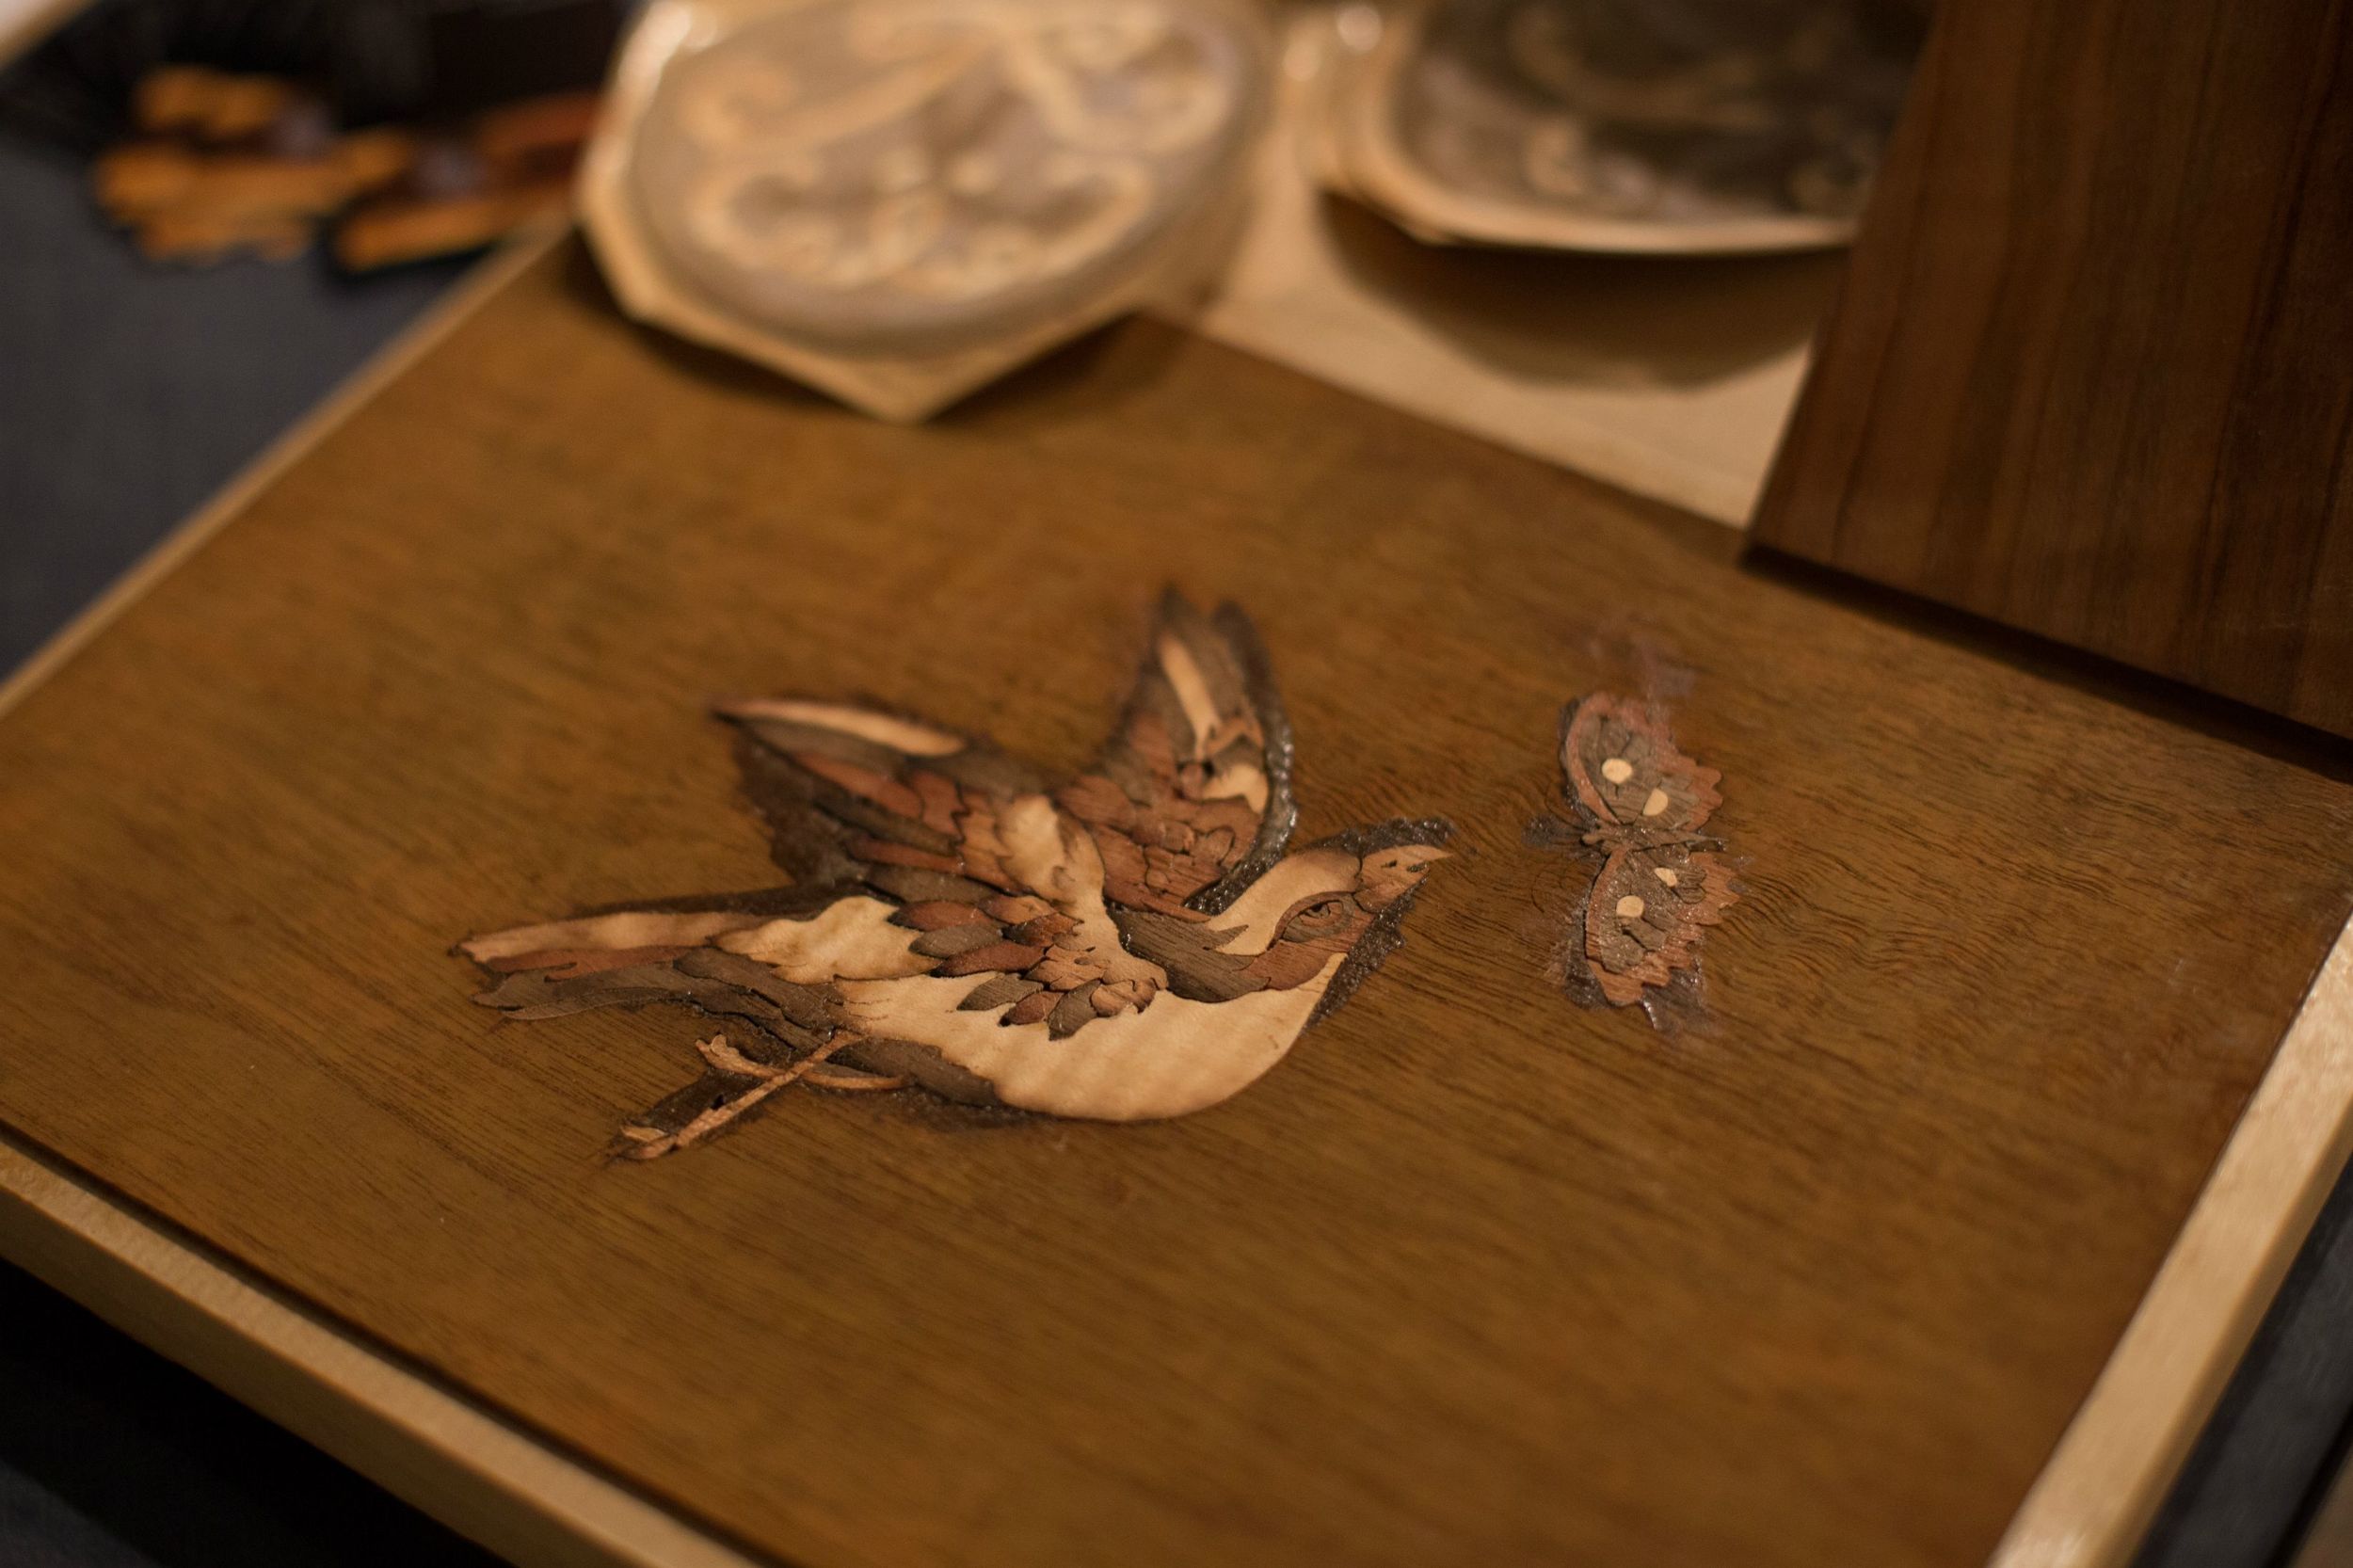
1-3. Here are my test samples. Notice the big gaps. As mentioned before this technique allows you to cut out a piece more quickly than with the traditional piece by piece method but it also allows you to do something very interesting with the grain. Because the flower is cut all at once the grain flows through it seamlessly and with no gaps!

4&5. Here I've dialed in the method for cutting this particular flower through some creative problem solving and practice pieces. No gaps!

6. I used 1.5mm thick maple for the test pieces. Éclaté in the tray!

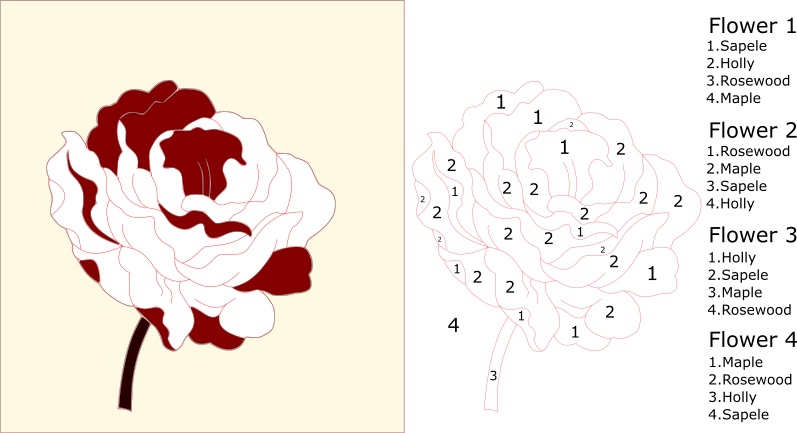
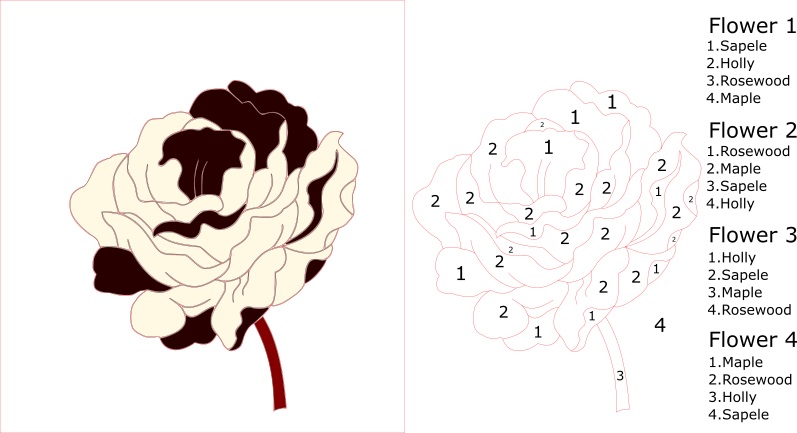
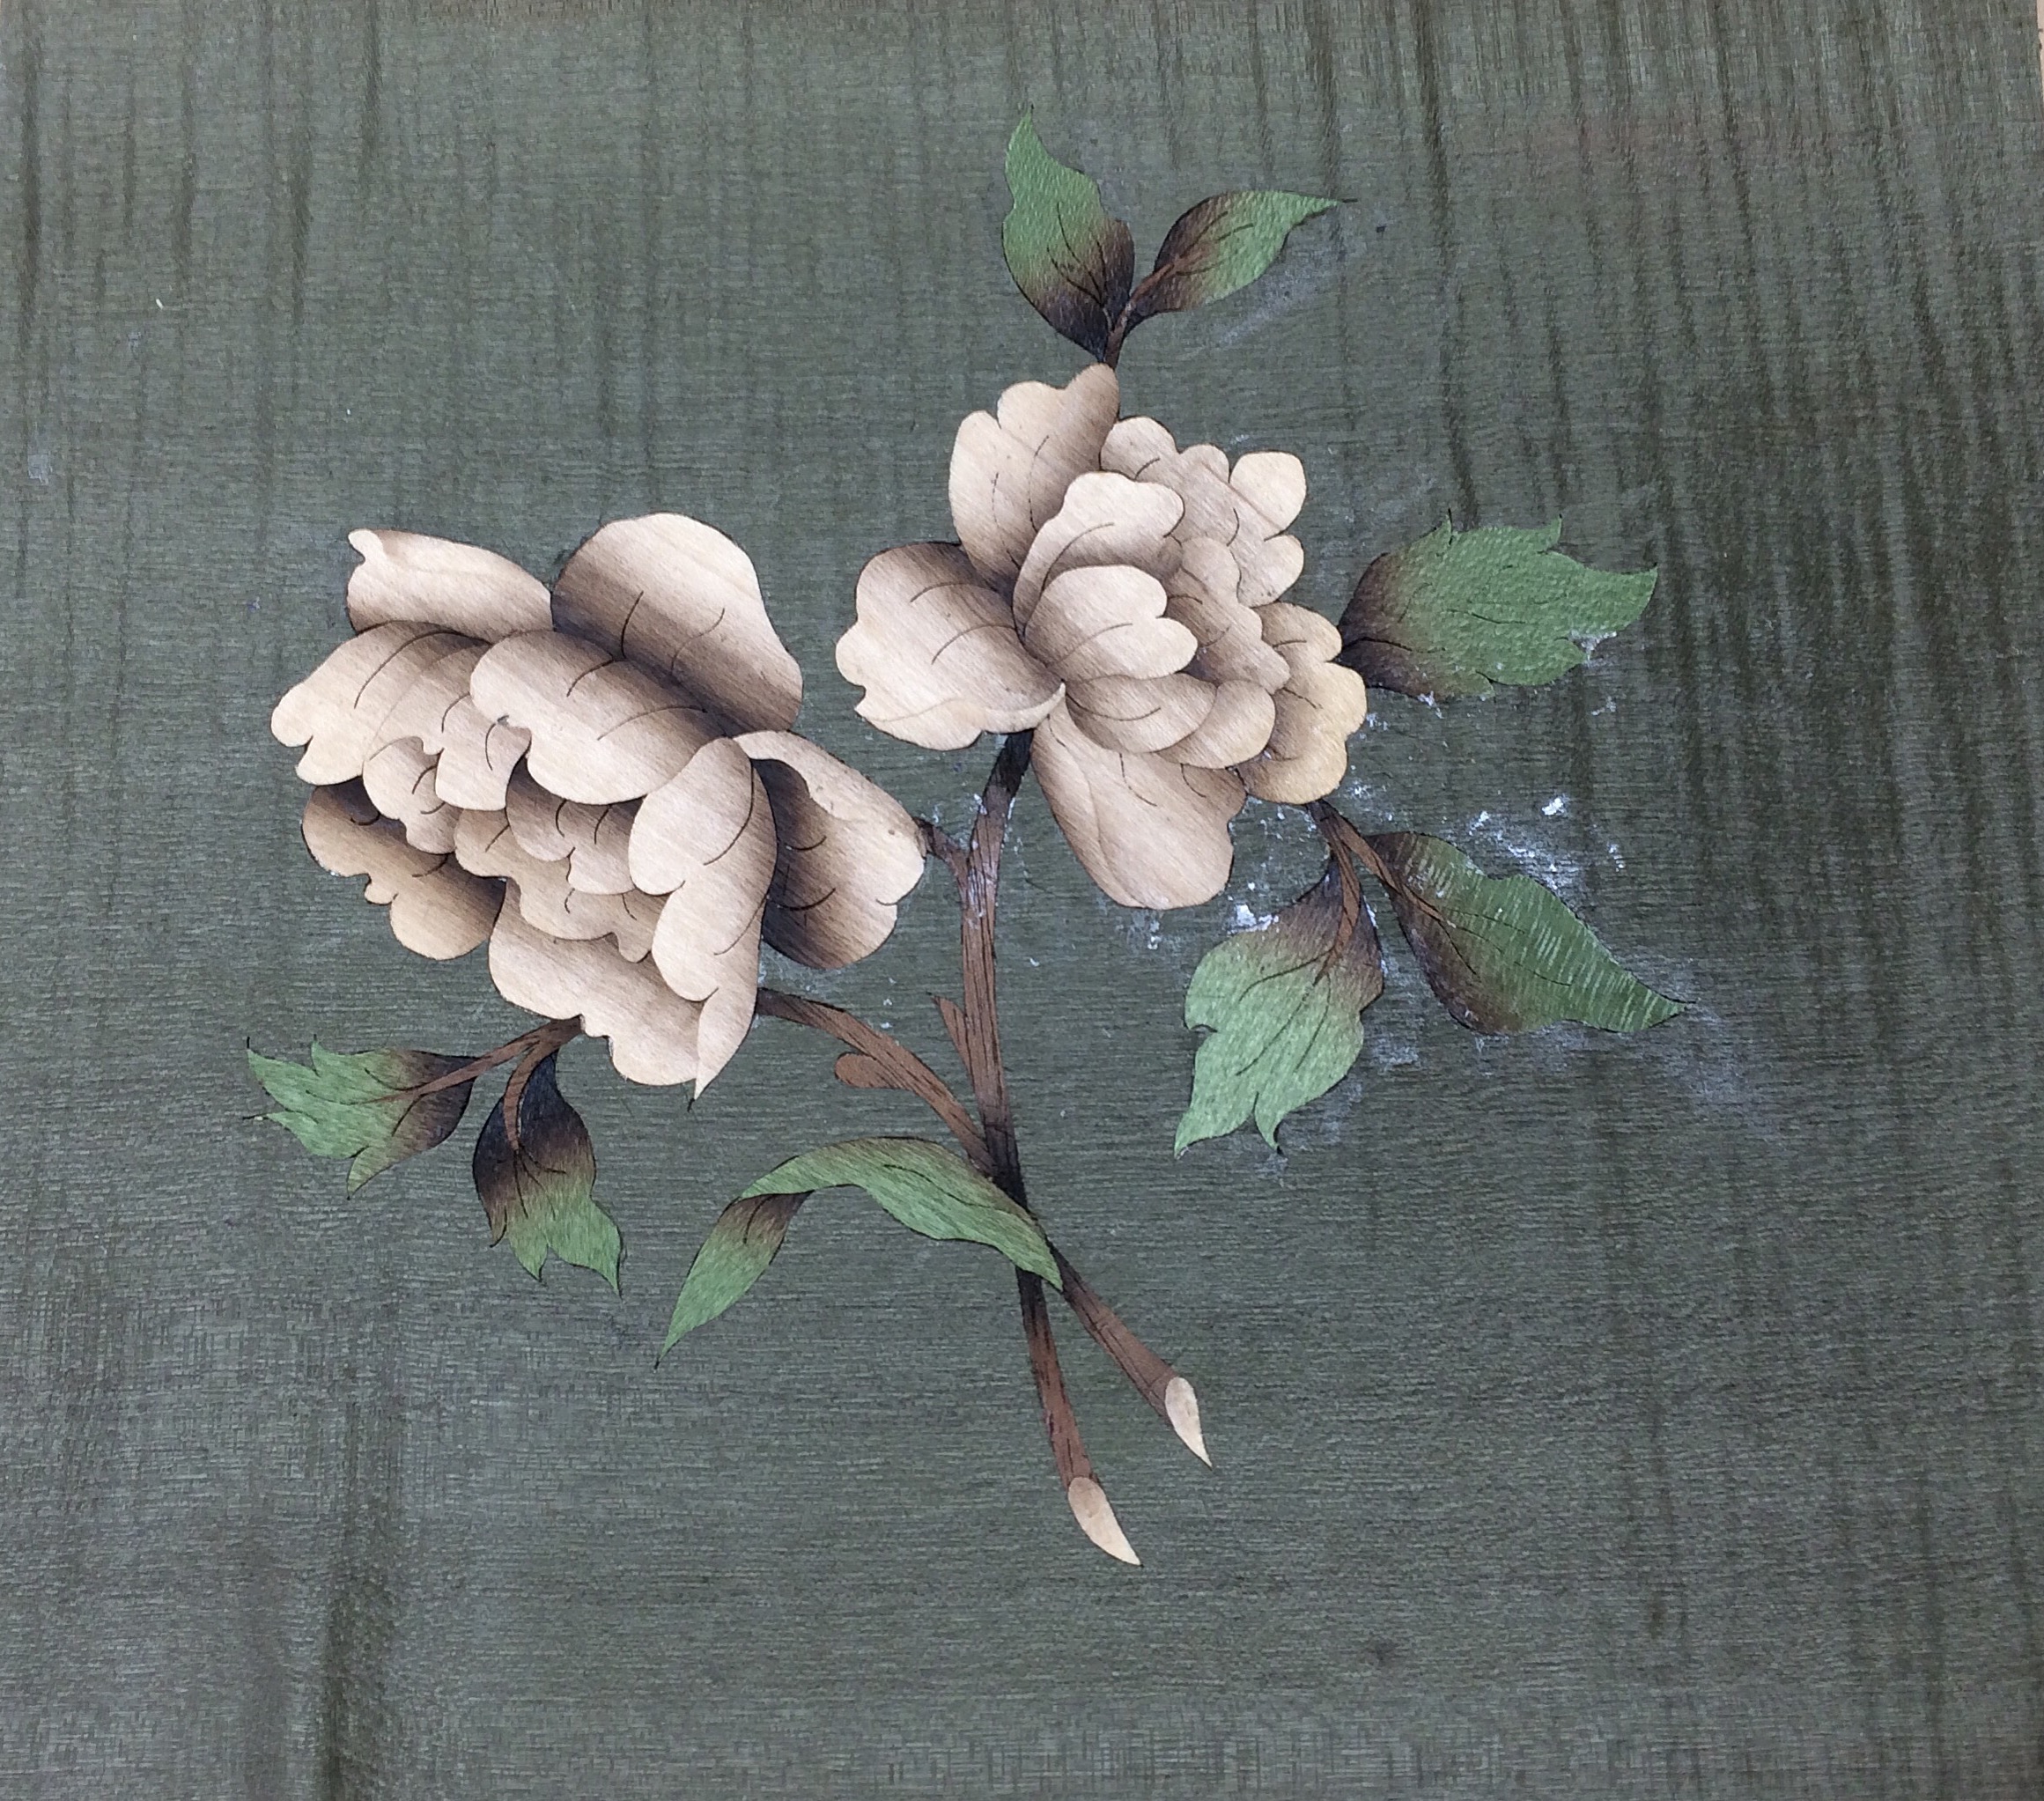
Here is the final design for the 2 flowers that make up the actual marquetry panel. I made a packet of curly maple and set to work.

I have indicators drawn in red to remind myself of places where I either need to a) remove the line plus a saw kerf of material, b) remove the line totally, c) split the line in half, d) leave the line, and e) leave the line plus a saw kerf of material. This applies to the exterior lines of the flower only. The interior lines should be split down the middle.

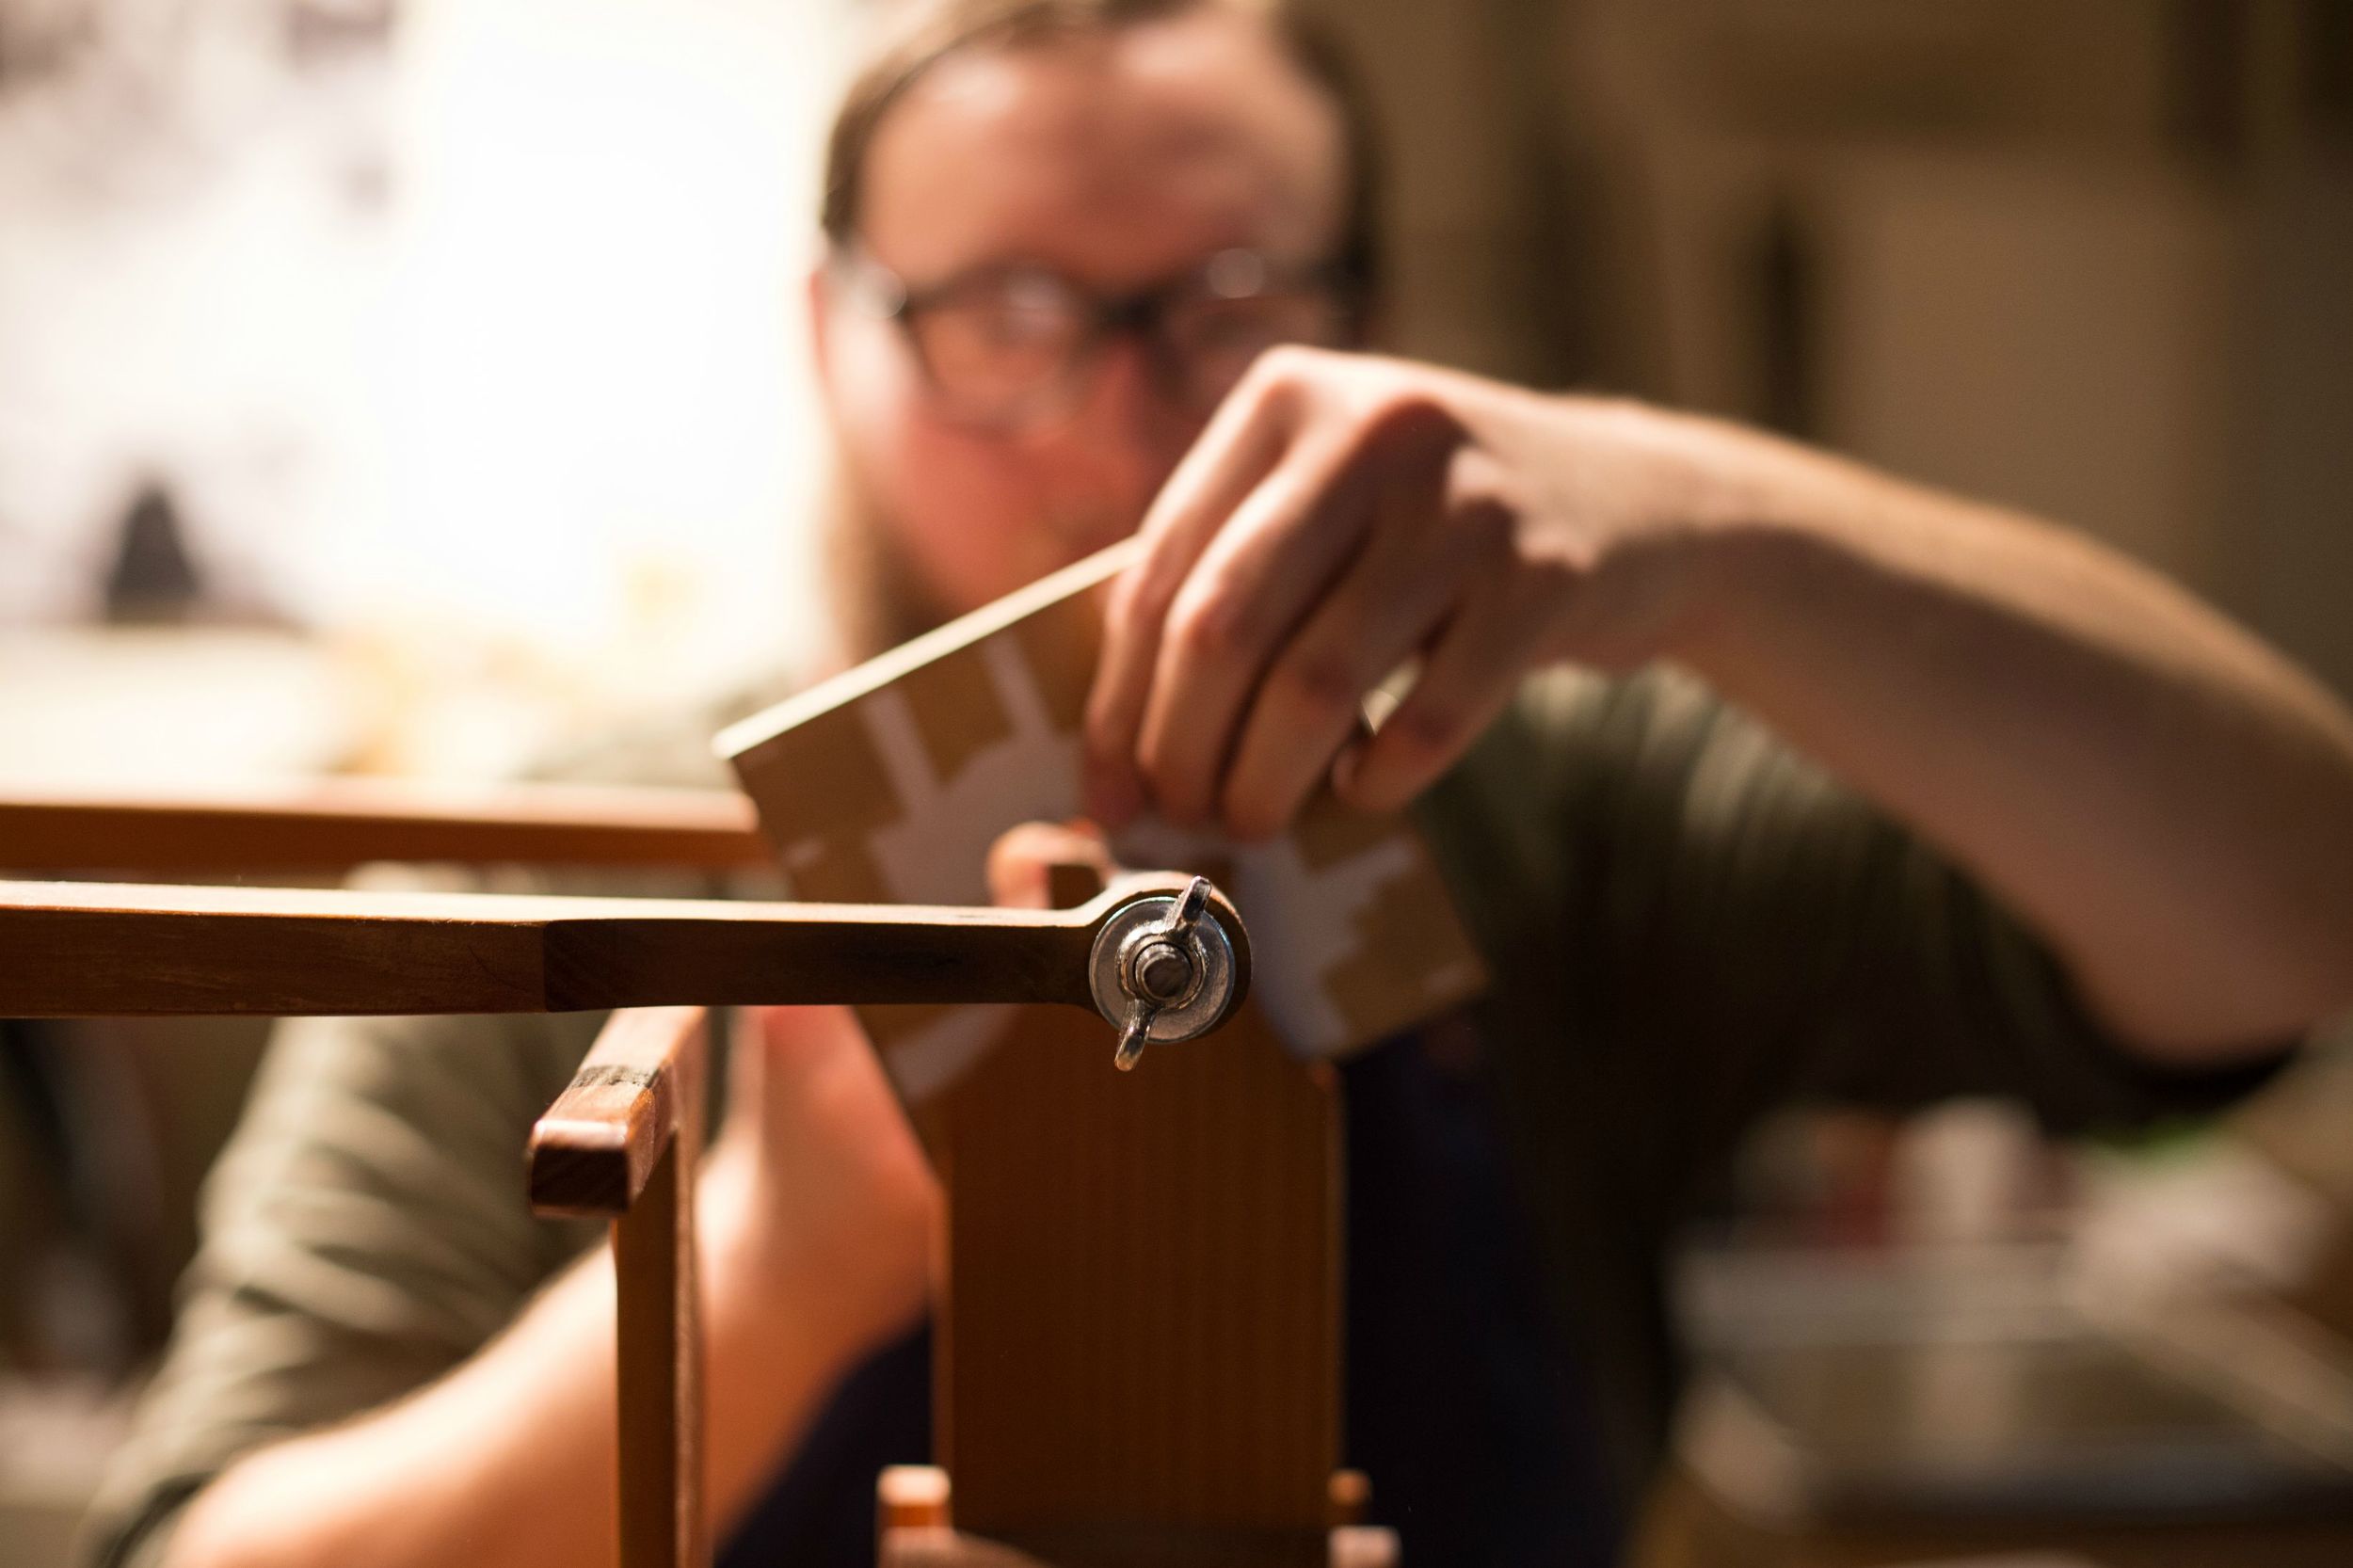
It is complicated and requires control and precision in cutting. It is difficult to cut the transitions smoothly.

Here I am cutting out the leaves for the panel with straight piece by piece technique. Note the "holes" at the tips of the leaves. This is an excellent method for making turns that are tighter than 90 degrees. Because all of the veneer outside of the leaf doesn't matter I can cut into it, make a sharp turn, then come back to the line.

View fullsize 24.JPG
View fullsize 25.JPG
View fullsize 26.JPG
View fullsize 26a.jpg

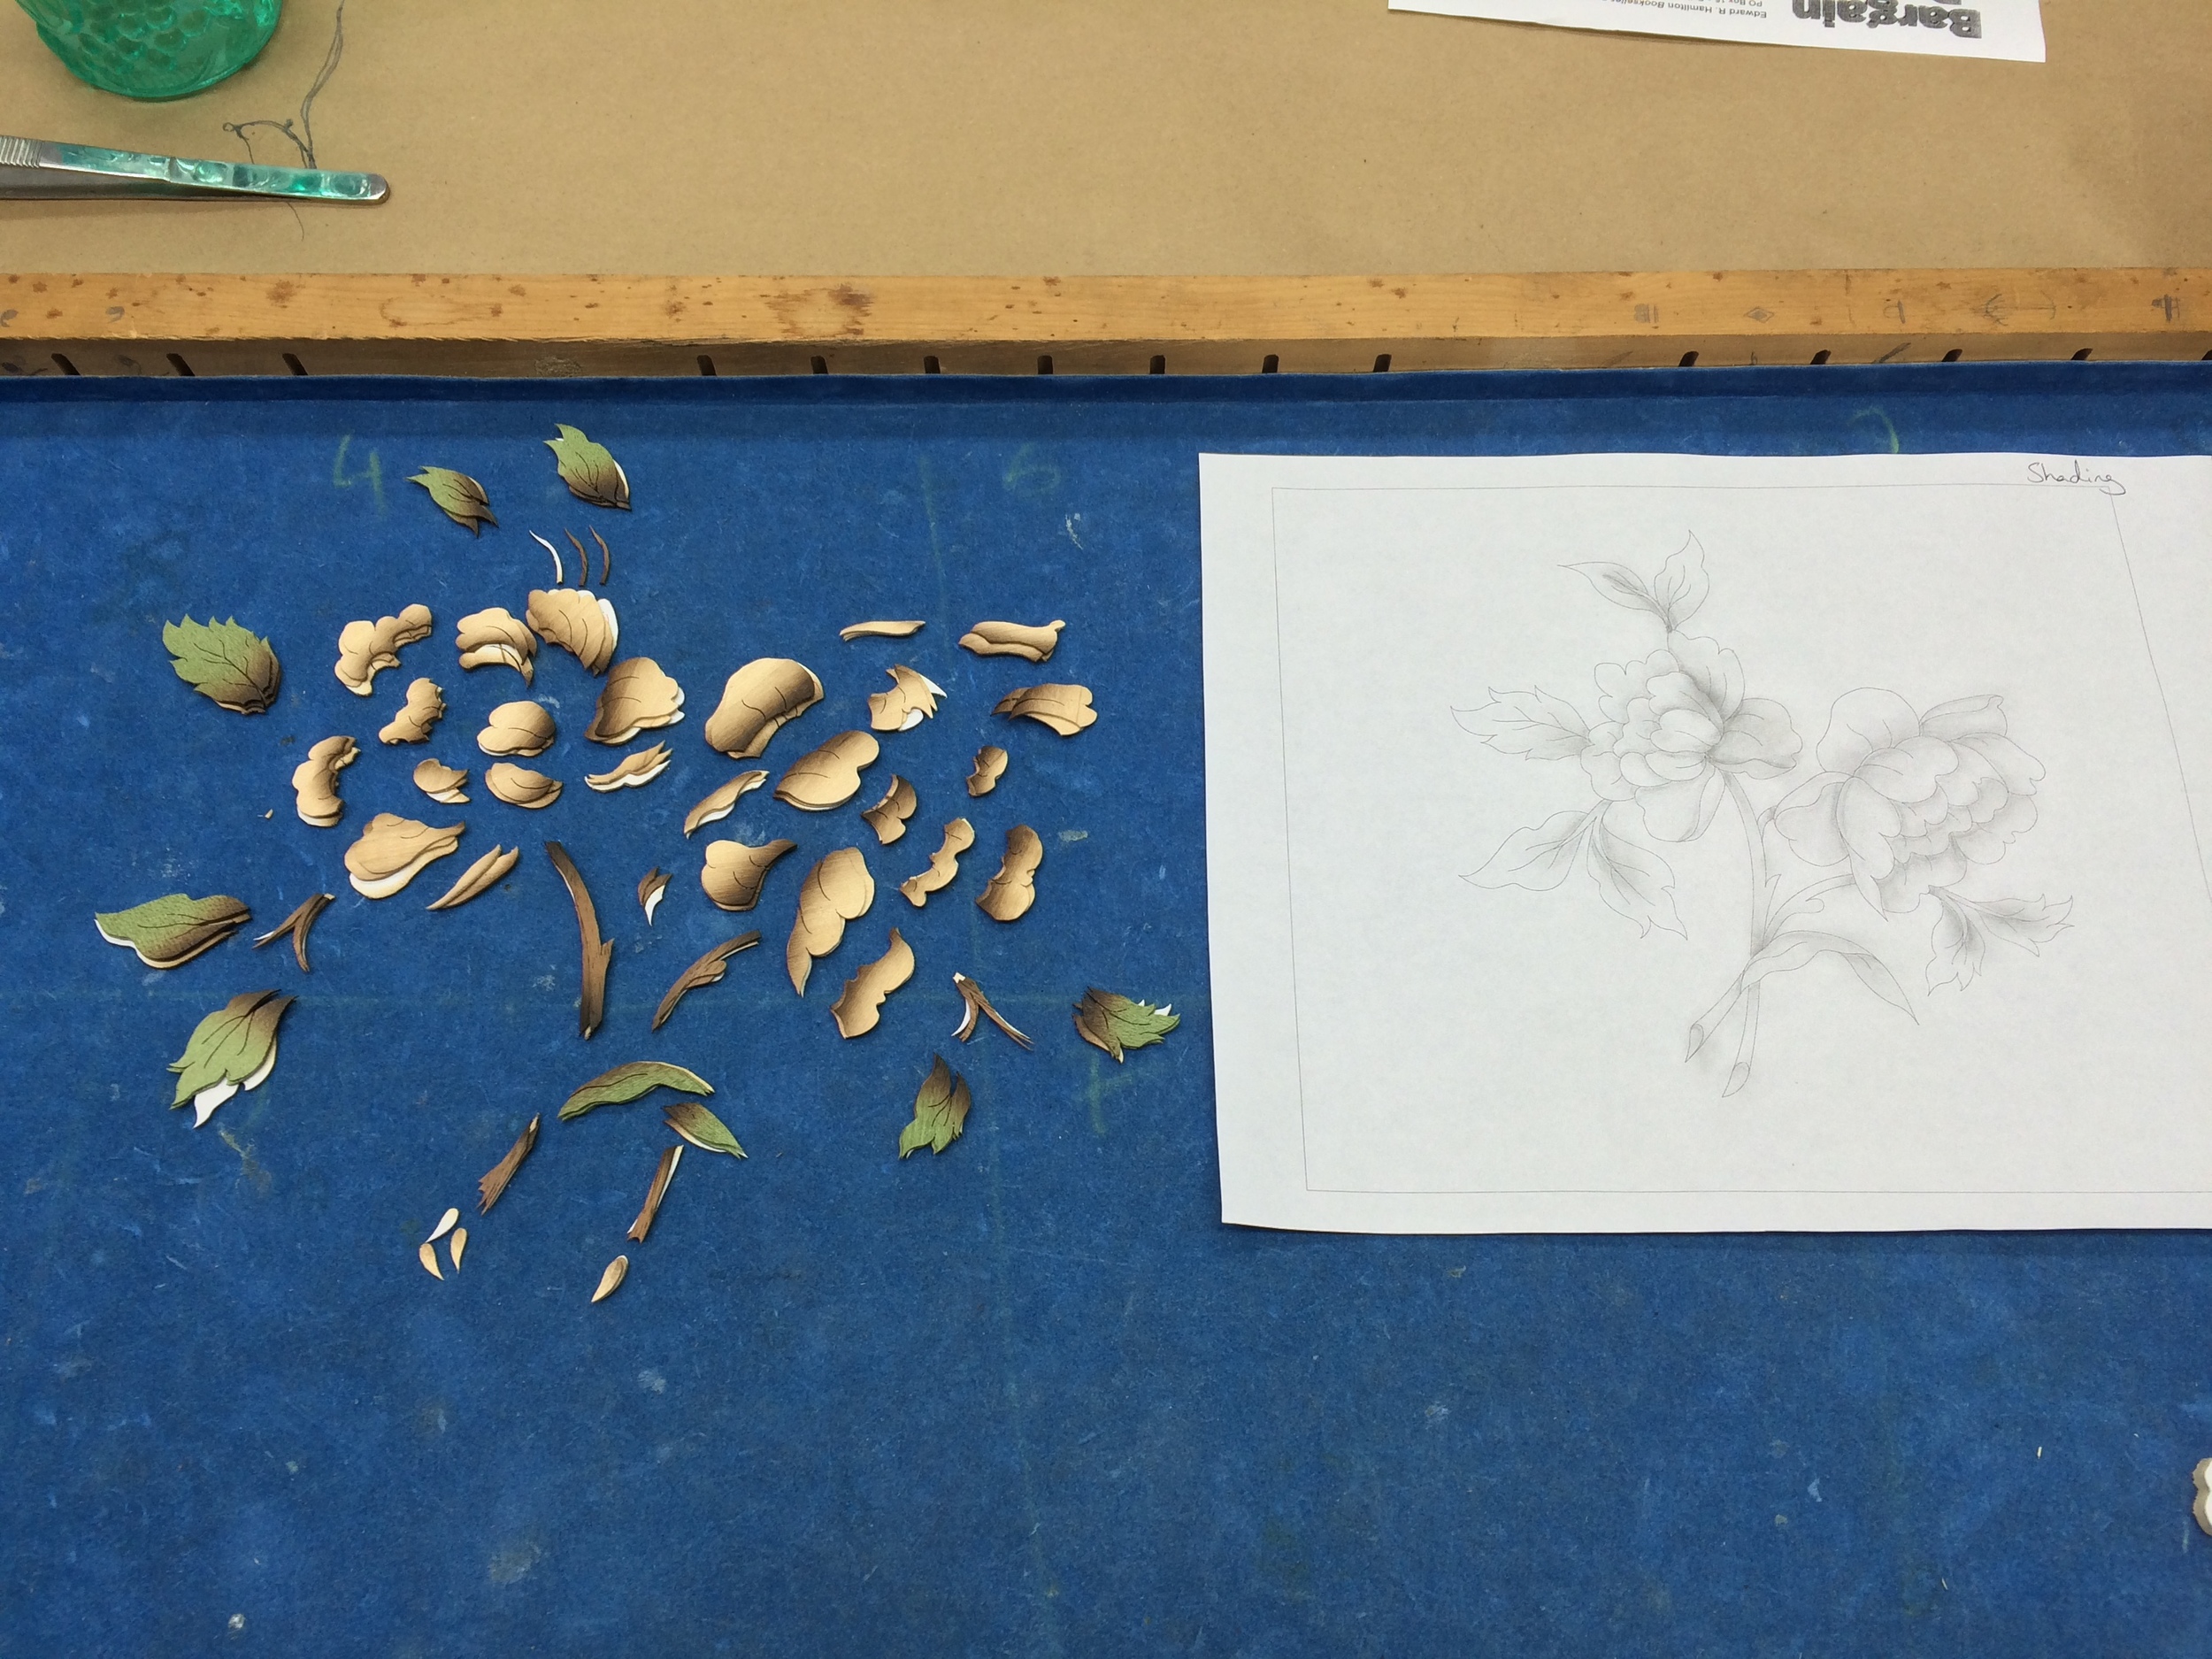
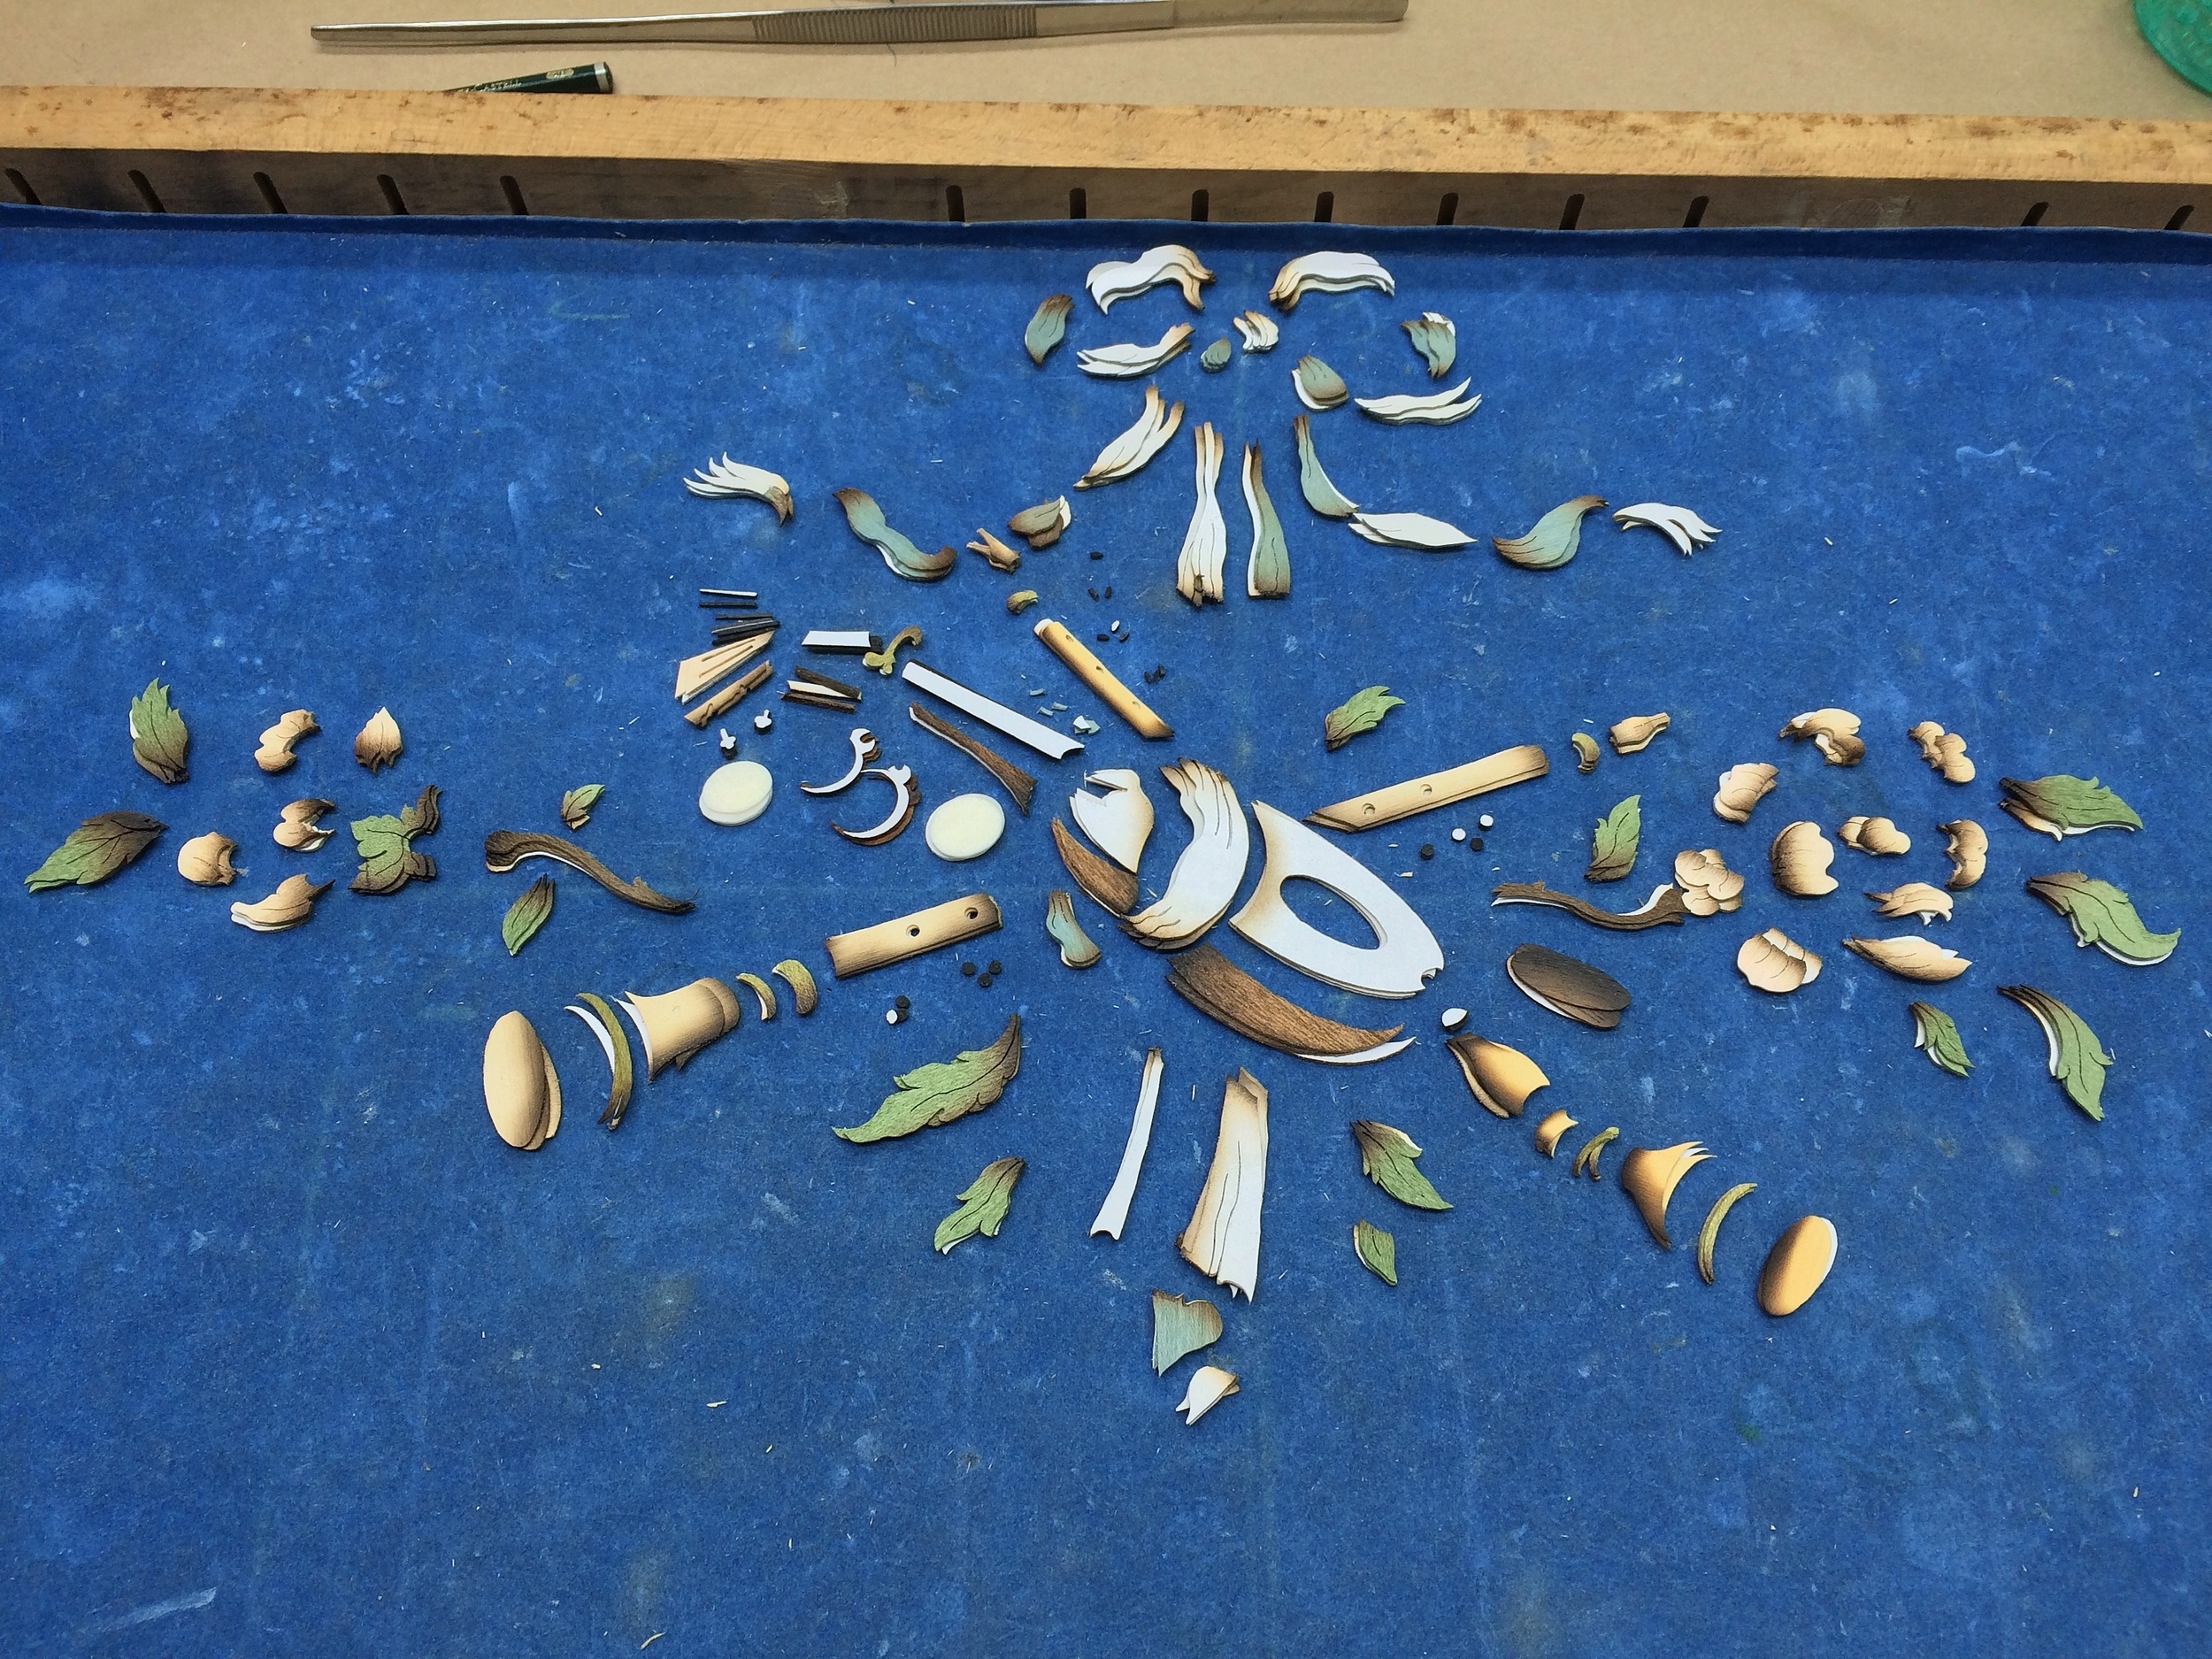
1. Laid out in exploded view to make sure I have everything.

2. Here I've made my shading guide. It's important to plan out your shading as it can determine the success or failure of a piece.

3&4. A reasonably good job of following the shading.

View fullsize 27.JPG
View fullsize 29.JPG

1. This is the background packet which is cut after the interior elements. This piece has two bridges. Bridges keep isolated or weak background elements in place so they don't move when the background is pressed onto the assembly board with hot hide glue. After this the bridges are cut with the tranchet so the interior elements can be placed inside the background.

2. The bridges in the actual background veneer. Notice the background element is suspended by them.

View fullsize 30.JPG
View fullsize 31.JPG
View fullsize 32.JPG
View fullsize 33.JPG

1. Here the piece is assembled face down.

2. Pressed onto a substrate.

3. Alcohol to show the colors once it's French polished.

4. Ready for final sanding and French polishing. This is the first éclaté piece done in North America in over 10 years.

My diploma!

In Marquetry Tags Marquetry, Marqueterie, The American School of French Marquetry
Comment

Part I: American School of French Marquetry – Music Motif

February 23, 2016 Luke Addington

A 50+ hour advanced study project at ASFM (The American School of French Marquetry) focused on this piece by piece music motif. Piece by piece is the most technically difficult and complex method for cutting marquetry. The goal is to either leave half of the 0.1mm line or remove it completely without taking any extra material. This is what gives you a seamless fit in the finished panel.

View fullsize 1.JPG
View fullsize 2.JPG
View fullsize 3.JPG
View fullsize 5.JPG

To keep this organized I will number the explanations for the photos working from left to right for the entirety of the post. 1. refers to the top left, 2. top right, 3. bottom left, 4. bottom right, etc.

1. Good marquetry starts with a good drawing. I had about 20 copies. The first three copies are pulled from the stack and used for a color index, shading guide, and background template in that order. This is my color index for this piece.

2. The rest of the copies are used to cut out the interior elements. All of these should be cut out with about 1mm around the outline. It's a good idea to organize them in an exploded view to make sure you don't leave any pieces out.

3. Afterwards the pieces can be organized by color. This helps speed up and organize the packet assembly process.

4. All of the pieces are now glued to the veneer packets with hot hide glue. Each packet, from the bottom up, consists of a 3mm backer board, a layer of grease paper, three 0.9mm sliced veneer sheets, and the glued on design. Veneer nails are placed around the elements to firmly hold the packet together. It took about two 10 hour days to make up all the packets I needed and to get all of the prep work done. At this time I also prepared the background packet which is kept inside a press for the duration of the interior element cutting as to not introduce any kind of warping or movement inside the pack. In a previous blogpost I show the construction of a background packet.

Video of the chevalet de marqueterie in action.

View fullsize 6.JPG
View fullsize 7.JPG
View fullsize 8.JPG
View fullsize 8a.jpg
View fullsize 10.JPG
View fullsize 11.JPG

1&2. Focusing on smooth lines and sharp corners. As you advance you don't have to worry so much about hitting the line (you'll start to feel the line and hit it naturally) but making a beautiful line. When I first learned piece by piece I used the slow cutting and easily controlled 2/0 Escargot blade. For this study period I switched to the fast and aggressive 2/0 Pebeco skip tooth blade for speed and efficiency. It took a while to get used to but after about 12 hours of cutting I started to feel good with it.

3&4. All of the pieces cut out and again organized by color. Working away in my corner of the shop.

5&6. Showing the thickness of materials. For these practice pieces it is perfectly fine to use 0.9mm sliced materials. On real pieces 1.5mm thick material is the standard. The bone is at 1.5mm. Compare this to the other materials around it. Very nice to work with. I cut this with a 2/0 Escargot blade instead of the 2/0 Pebeco blade I used for everything else. It's a bit too tough for the pebeco. The escargot cut beautifully.

View fullsize 12.JPG
View fullsize 12a.jpg
View fullsize 13.JPG
View fullsize 13a.JPG

1-3. Organized in exploded view to make sure nothing is missing and checking some of the colors after sand shading.

4. Backer board after cutting the background.

View fullsize 14.JPG
View fullsize 15.JPG

1. The piece assembled face down on French kraft paper with hot hide glue. This is an incredibly important part of the French process.

2&3. Panel cleaned up a bit and pressed onto a substrate. At this point it is ready for final sanding and the beginning of French polish.

The next blog post will focus on a second study piece at ASFM where I completed a fleur éclaté marquetry panel.

In Marquetry Tags Marquetry, Marqueterie, The American School of French Marquetry
Comment

1675 Gole Flower

September 30, 2015 Luke Addington

Here are some photos from my marquetry demonstration this past Monday. By the end of the evening we had a crowd of about 20+ people watching with well over a hundred people stopping by throughout. I was very surprised to see so many people interested in marquetry.

Following is Pierre Ramond's tracing of a flower in the Pierre Gole bureau (1675). I initially trace this drawing in inkscape, creating a rough vector drawing. This allows me to scale the drawing up or down without loss of quality. After getting the rough drawing done I go back to a photo of the original flower and adjust the drawing so it more closely resembles the actual flower. Then I arrive at the final drawing I will work from - quite different from my first version. I draw the outline in red as it is easier to see while sawing.

View fullsize 1.jpg
View fullsize 2.jpg
View fullsize 3.jpg

Then I create color maps and plan out what veneer species I will need to match the original flower. For this particular flower I only really needed two veneers, a light and a dark. But I wanted multiple copies so in my packet I assembled two light and two dark veneers. Those were Holly (sawn by myself at 2mm thickness), Sapele 1.6mm, Rosewood 1.6mm, and Curly Maple 1.6mm. Here's a video showing some of the prep of the Holly veneer. I also paper back all of my veneers. It provides a lot of stability to the veneers during sawing as well as during removal from the packet. Here's a short video of that process with instruction.

Next I flip the image so when I go to assemble the flower face down it is easier to keep track of what piece goes where.

View fullsize 4.jpg
View fullsize 5.jpg
View fullsize 24.jpg
View fullsize 25.jpg
View fullsize 26.jpg
View fullsize 27.jpg
View fullsize 28.jpg
View fullsize 29.jpg

The next series of images show the flower being cut out on the chevalet and organized on a tray.

View fullsize 6.jpg
View fullsize 7.jpg
View fullsize 9.jpg
View fullsize 10.jpg
View fullsize 13.jpg
View fullsize 11.jpg
View fullsize 14.jpg
View fullsize 15.jpg
View fullsize 16.jpg
View fullsize 17.jpg
View fullsize 18.jpg
View fullsize 19.jpg
View fullsize 20.jpg
View fullsize 21.jpg
View fullsize 22.jpg

This is where we ended the night. All of the petals are cut out and the initial organization is done. After this I would mix the colors according to the color maps, shade the pieces with hot sand, then assemble them face down on an assembly board.

In Marquetry, Teaching Tags Marquetry
Comment

Marquetry Demonstration

September 23, 2015 Luke Addington

This Monday I will be doing a Boulle Marquetry demonstration at my friend and great stone sculptor Joe Brown's shop, Studio A at the Metal Arts Village here in Tucson, from 6pm-9pm Monday the 28th. We only have three hours but I hope to demonstrate each step and finish the evening with a few copies of a Boulle flower to give out. I'll be bringing in multiple marquetry projects at various stages of completion to use as teaching aids. I'll also be sawing up some veneers to illustrate the difference between traditional thick sawn veneers and modern thin sliced veneers.

I hope to see you there!

In Marquetry Tags Marquetry
Comment
Older Posts →

Copyright Addington Furniture LLC, 2015