• Portfolio
  • About
  • Blog
  • Social
  • Contact
Menu

Addington Furniture

7773 W Torngat Ct
Tucson, AZ, 85743
Phone Number
Conservation • Restoration • Recreation

Your Custom Text Here

Addington Furniture

  • Portfolio
  • About
  • Blog
  • Social
  • Contact

Moxon Vise Class

June 29, 2015 Luke Addington

A few photos of students making their Moxon Vises in the class I taught Saturday-Sunday, June 27 & 28 2015. These were made with 8/4 cherry from Amish sawyers in Ohio, milled down to 1 3/4", with Benchcrafted hardware. Rear chops are 40" long and front chops are 36" long. We made two sizes, 5 3/4" tall and 6 3/4" tall. Students were able to pick which height worked best for them. Everyone got their vises finished and their stopped chamfer and Lamb's Tongue carved! Great class.

Here the students (from left to right: Chuck, Rob, Bill) are working as a team on the drill press to bore out the holes that will accept the acme screws. After that they chopped out square mortises to house the nut that receives the screws.

View fullsize 06 - RzgpDKU.jpg
View fullsize 07 - BRz119k.jpg
View fullsize 08 - 6QXy0Wu.jpg

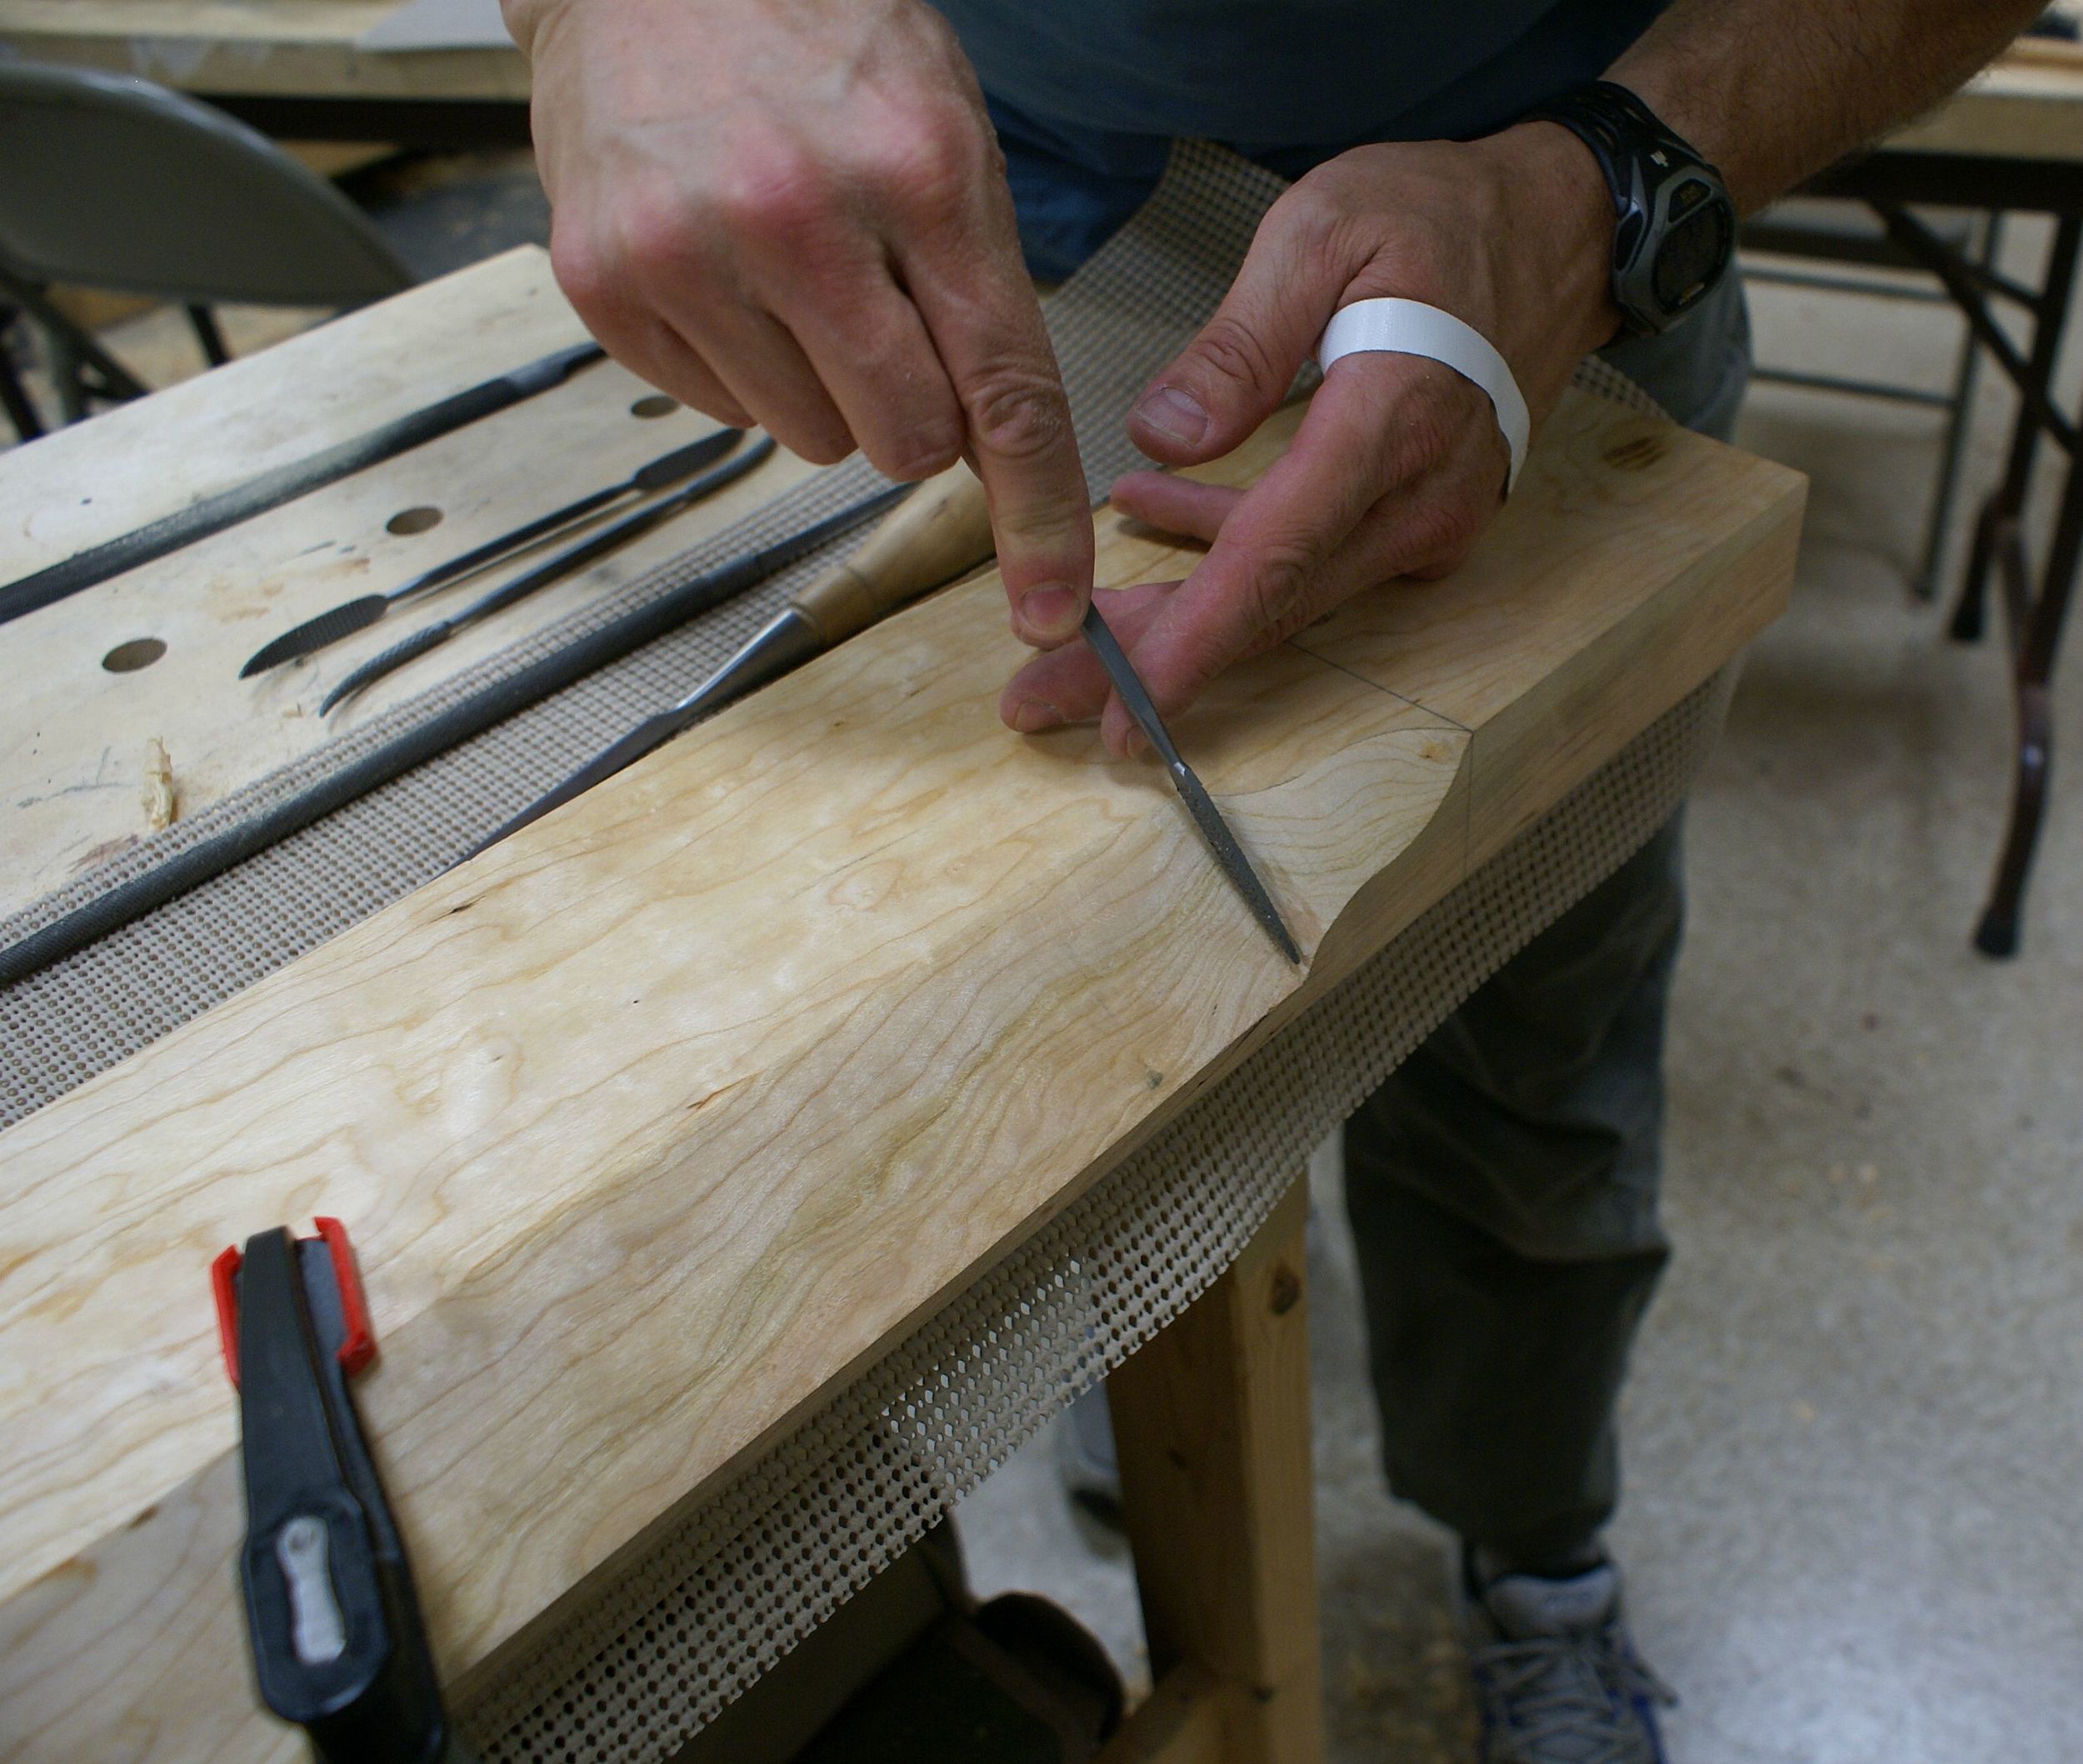
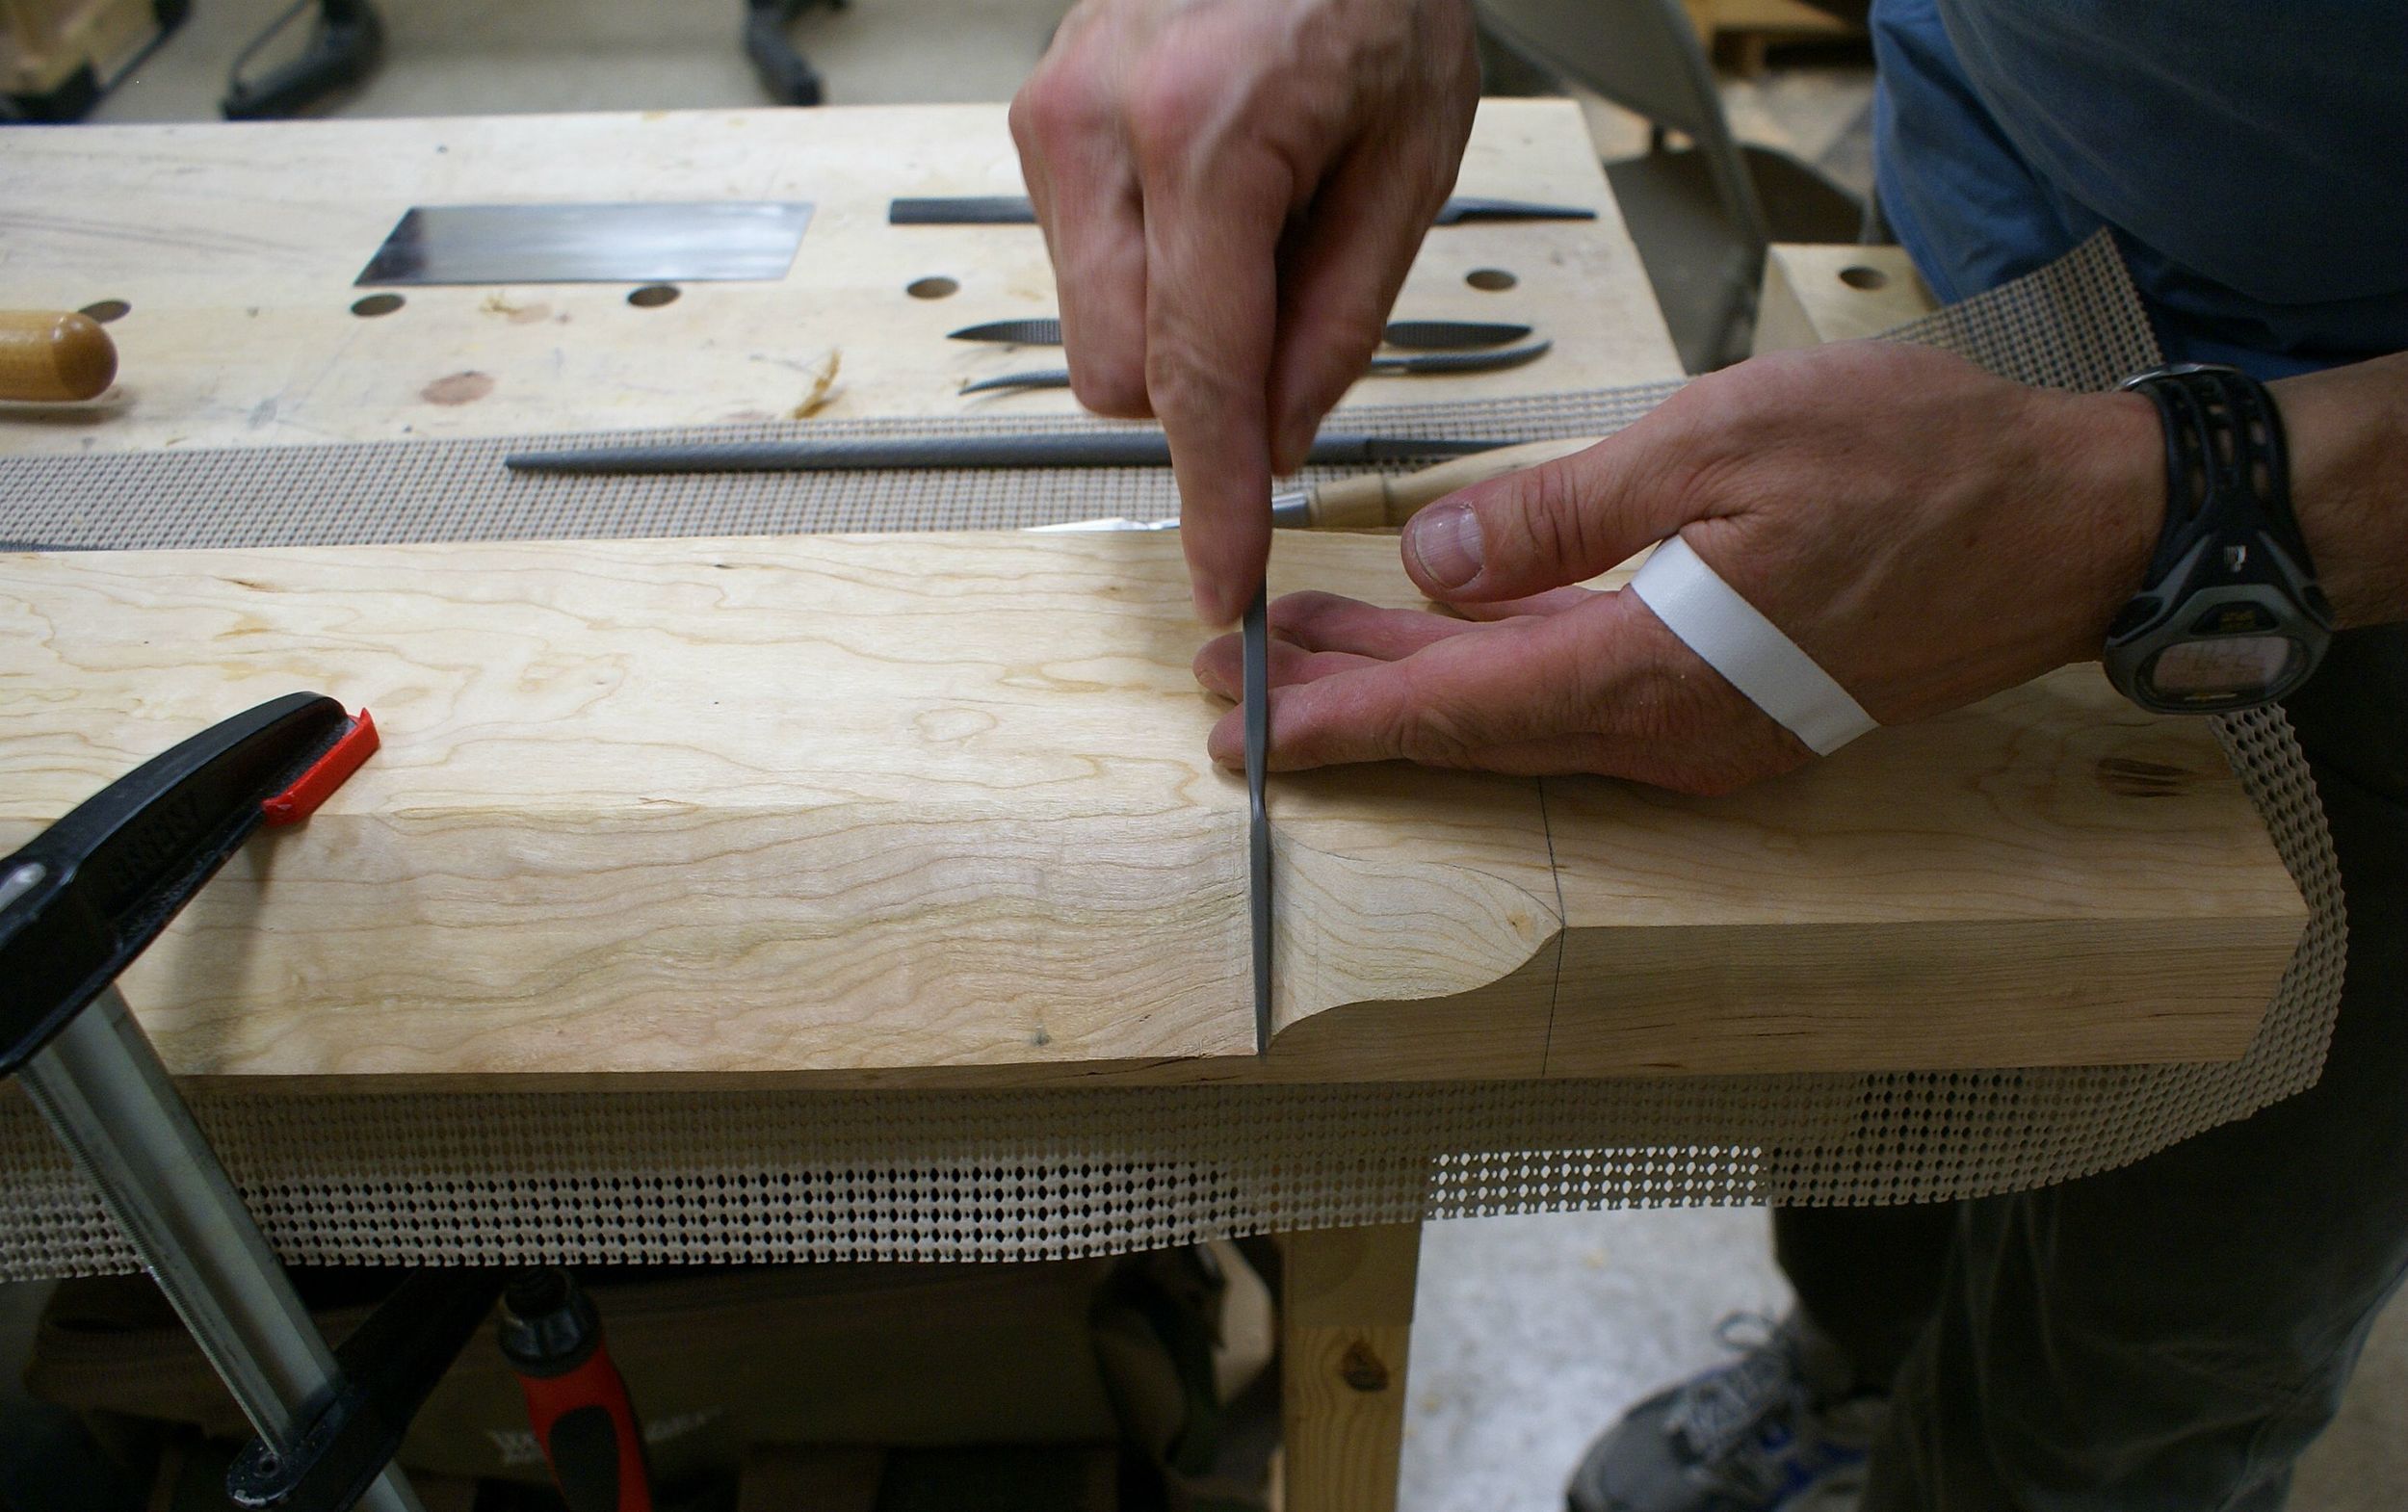
After the mechanical aspects of the vises were taken care of the students moved on to the stopped chamfer and Lamb's Tongue. Here they have laid out lines that will be sawn, then chopped, and cleaned up with a spokeshave & scraper to create the stopped chamfer.

View fullsize 09 - 1UmUxB8.jpg
View fullsize 11 - wLNkjIq.jpg
View fullsize 12 - MQGfYSf.jpg
View fullsize 13 - klDvQgB.jpg

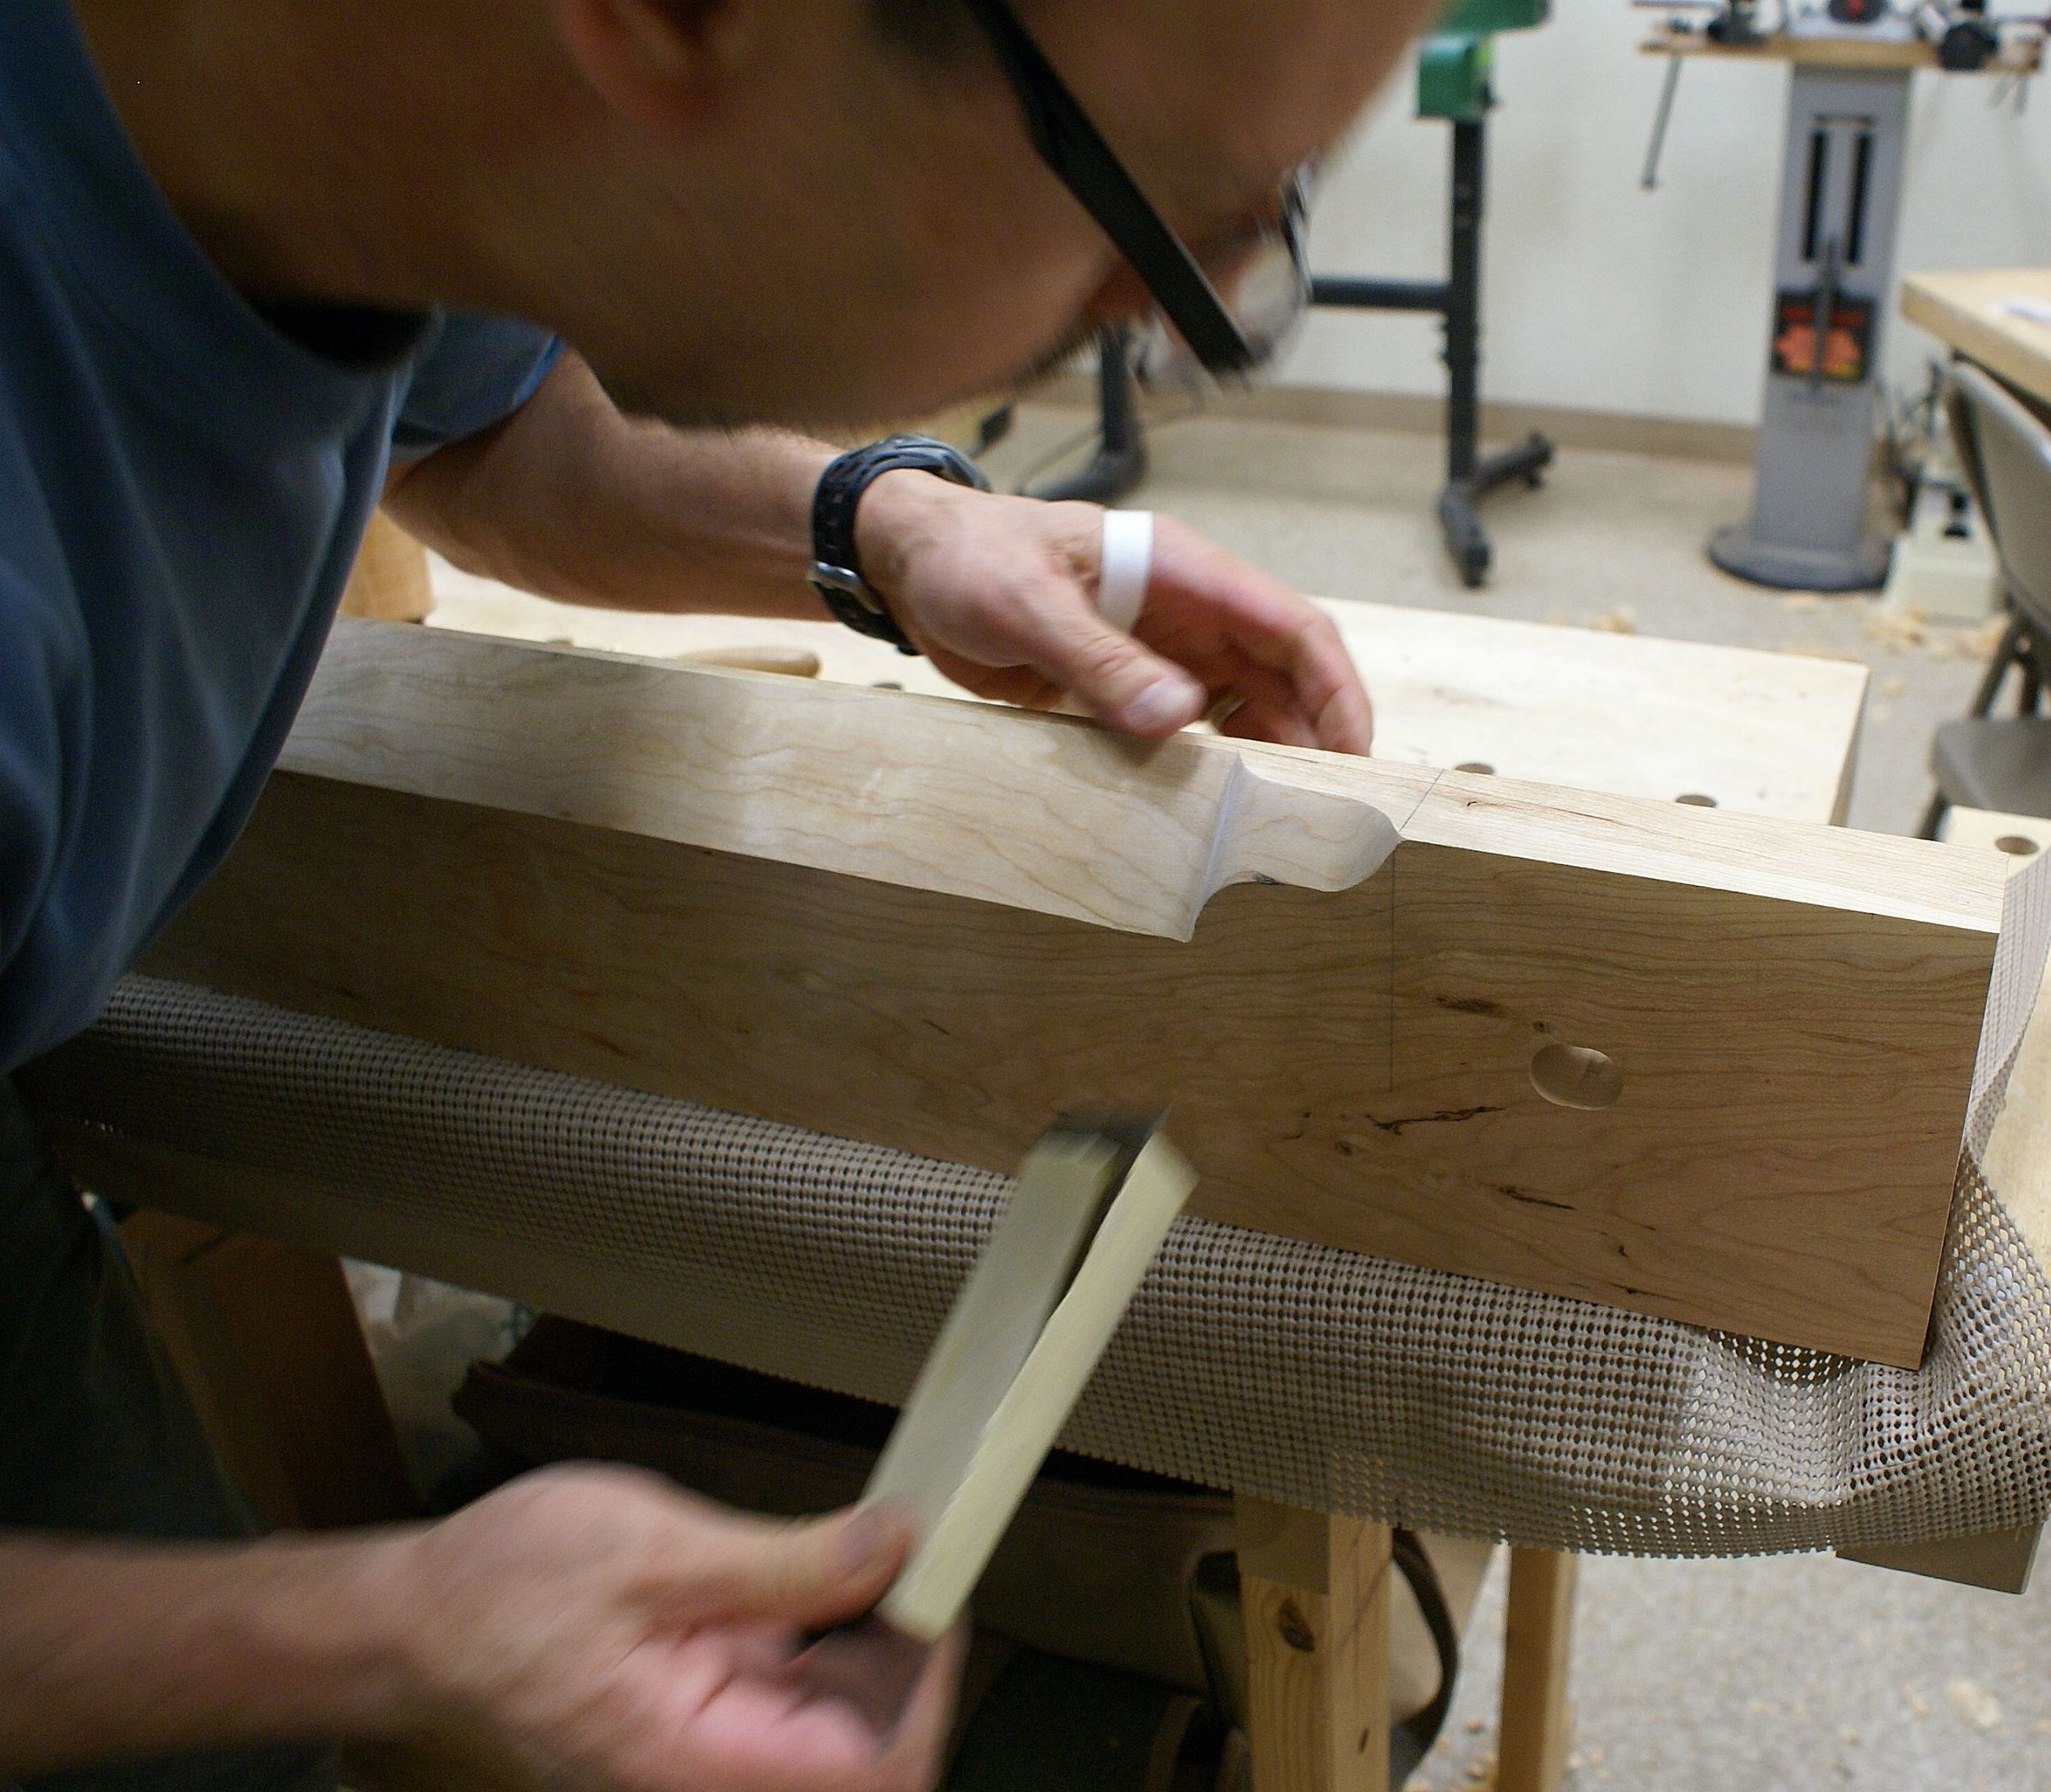
Now the students saw out the bulk of the waste for the Lamb's Tongue. This is then refined with chisels, files, rifflers, scrapers, and very fine sandpaper.

View fullsize 14 - IFJGwj3.jpg
View fullsize 15 - itfcXPe.jpg
View fullsize 17 - 21YrEFq.jpg
View fullsize 18 - ANZdhx9.jpg
View fullsize 19 - 5Agd7HO.jpg
View fullsize 20 - K7n4z1r.jpg
View fullsize 21 - NDnldek.jpg
View fullsize 22 - ewSTLMF.jpg
View fullsize 23 - DBD0wL4.jpg
View fullsize 24 - CM2xlul.jpg
View fullsize 25 - 5viyu7B.jpg
View fullsize 26 - WUNutof.jpg

I grabbed a couple photos of Rob with his vise.

View fullsize 01 - 3QMw07l.jpg
View fullsize 02 - 8HYBB87.jpg
View fullsize 03 - 7GqEhjA.jpg

Chuck had one more face to plane on his vise (below) and then he was done. Everyone decided to add suede to the jaws at home. Bill had to take off before I was able to get a photo of his vise.

View fullsize 04 - E6VTbAd.jpg
View fullsize 05 - 4RP7i5p.jpg
View fullsize 28 - ZF7kHfh.jpg
View fullsize 29 - UZP8X08.jpg
In Tools, Teaching Tags Joinery, Moxon vise
Comment

Veneer Hammers & French Polish - Part II

April 8, 2015 Luke Addington
View fullsize 1.jpg
View fullsize 2.jpg
View fullsize 3.jpg
View fullsize 4.jpg
View fullsize 5.jpg
View fullsize 6.jpg

A few finished photos of the veneer hammer. I'm pretty happy with the French Polish. I tested it out this evening and it works beautifully. Looking forward to using this tool for many years to come. My good friend Joe shot these photos for me. 

In French Polish, Tools Tags Veneer Hammer, French Polish
Comment

Veneer Hammers & French Polish - Part I

April 7, 2015 Luke Addington

I rescued a few small pieces of ebony from becoming parts of cutting boards and decided to make them into something I will use for the rest of my life - a veneer hammer. Hammer veneering is one of the oldest and most effective methods for adhering veneer to a substrate with hot animal protein glue. The hammer works more like a squeegee than an actual hammer. Here's a good video if you're interested in seeing the process. 

I started out with a piece of African Blackwood that was 4" wide by 6" tall. I marked a center point on the edge and then set my compass to mark out a half circle spanning the entire width of the piece. I then marked a center line down both the length and width of the piece. At that intersection I again set my compass and drew a half circle. After that I marked two more half circles that would flow and nicely connect the half circle on the top and bottom. Then I marked out a 1" mortise a half inch down from the central point on the front and back of the piece and chopped it out. It helps to prevent splitting by chopping out the mortise now instead of after shaping the head. 

View fullsize a.JPG
View fullsize s.JPG

I used a frame saw with a thin blade to shape the head but a scroll saw, band saw, or even fret saw can easily do the job. I used half round rasps and files to clean up to the lines I drew out previously. I used a 1/4" thick piece of brass I bought from a local industrial supply company - 3/4" wide by 1' long for about $5 - for the tip. I used a hacksaw to cut it to length - 4 1/2" (you want the brass to extend past the edges of the hammer head so you can get into corners when veneering), creating a slight angle at each end. Then using a file I brought the edge to a rather sharp radius - this is the point that will make contact with the veneer. I used a crosscut saw to cut a slot into the mouth of the hammer to receive the blank, then used a fret saw to remove the waste in between each saw kerf. Chisels and rifflers cleaned up after that. I then sawed a tenon in the end of my piece of Gaboon Ebony (12" long, 1 1/2" thick & wide) leaving a 1/4" shoulder all the way around. 

View fullsize d.JPG
View fullsize 4.JPG
View fullsize DSC09399.JPG
View fullsize DSC09448.JPG

I had seen an antique French scraper handle in the book "The Art of Fine Tools" by Sandor Nagyszalanczy and wanted to copy it for this hammer. I really enjoyed the proportions and I like the idea of working with an old design. It's a pretty simple shape to turn but feels really nice in the hand. I had to make a few modifications. First, to account for the tenon at the top of the handle I needed something to transition in to the skinny neck to mimic the scraper. I made a simple cove that I think works well. Second, I made my handle a little thicker to account for the extreme pressure that will be focused around the neck of the handle during the process of hammer veneering. I then made an ebony wedge from an offcut, cut a slot in the tenon, and assembled the joint with Old Brown Glue, driving the wedge home for a very tight fit. I then used rasps and files to gently slope the front of the hammer head and glued the brass in place. 

View fullsize 5.JPG
View fullsize DSC09484.JPG
View fullsize 11090873_10206452684264348_2191413872474835271_o.jpg

A flush cut saw and card scraper made short work of the protruding tenon & wedge. I sanded everything up to 800 grit and burnished with 0000 steel wool. This is how the hammer looked after that process.

View fullsize 1.JPG
View fullsize 2.JPG
View fullsize 3.JPG

At this point the hammer was ready for finish. I decided to French Polish everything, more for fun than anything else. Here is my French Polishing kit (in France it is called "vernis au tampon" meaning "polish with a pad"):

  1. Squeeze bottle of 180 proof alcohol marked with an “A”.
  2. 4h pumice.  This gets put inside 2 layers of cheese cloth so it can be lightly dusted onto the workpiece.
  3. Salt shaker filled with non-drying mineral oil.
  4. Pore filling pad inside a large mouthed jar. I like these jars because they’re easy to get your hands in and out of. I mark the top of this jar “Ponce”.
  5. Super Nikco burnishing compound from France.
  6. Polishing pad inside another large mouthed jar.  I mark this jar “Vernis”.
  7. Freshly made dewaxed blonde shellac. Patrice Lejeune recommends a 1:4 ratio shellac to alcohol and I have found that to be perfect. I use a digital food scale set to grams to measure out my shellac and alcohol. This makes it very easy to keep everything consistent.   In this bottle is 20 grams shellac and 80 grams of alcohol strained through a very fine automotive paint strainer. I mix the shellac in a separate mason jar and then strain it into this squeeze bottle marked with an “S”.  
  8. Kraft paper. When I’m polishing I cover my bench or table with kraft paper for a clean surface. 

The first step of French Polish is called pore filling. In the second photo you can see my materials gathered and ready to go to pore fill. Instead of re-writing the book on French Polish, I will link to the best video about French Polish on the internet, by Patrice Lejeune of Antique Refinishers & The American School of French Marquetry. Patrice can explain much better than I ever could. 

View fullsize DSC09478.JPG
View fullsize DSC09528.JPG

In the next photo set I show a couple examples of pad construction. One for pore filling & one for polishing. Really you should find what works best for you. The basics are muslin, linen, shredded cheesecloth, and wool. I like to iron out the muslin and linen before using. 

View fullsize DSC09452.JPG
View fullsize DSC09454.JPG
View fullsize DSC09457.JPG
View fullsize DSC09459.JPG
View fullsize DSC09464.JPG
View fullsize DSC09465.JPG

After pore filling I hold the hammer up to a natural light source and check the reflectivity. If you look closely you can see the head reflecting the cactus from about 7 meters away. 

After pore filling a couple times with a day in between each session I waited another day and started the polish. The polishing does not take very long at all but yields an incredibly deep, reflective finish. 

View fullsize DSC09533.JPG
View fullsize DSC09539.JPG
View fullsize DSC09542.JPG
View fullsize DSC09544.JPG

Thanks for taking a look, next time I will have some nice photos of the finished hammer.

In Tools, French Polish Tags Veneer Hammer, Tools, French Polish
Comment

Copyright Addington Furniture LLC, 2015